Making a pedalboard
You should make a pedalboard as soon as you have more than one thing on the floor you might step on. I put this off for too long and regret waiting because
- Everything with a USB connection took more wear than it should have.
- The expression pedal and the toggleswitch board would sometimes move while I was playing and my foot actions didn't get as muscle automatic as might have been helpful.
- The signal path connecting to studio recording or house PA was not fully tested/solid/reliable/durable/repeatable.
- Setup and teardown was more time consuming.
Part of my reason for delay was that I have no stompbox effects. Everything on the floor is control interfaces and signal chains. When I searched for build tips, what I got was guitarists buying a pedalboard, velcroing their effects on, routing power to the pedals, and feeling good about being organized. For me there was no way control pedals are hanging on with velcro unless the pedalboard lives in a flight case.
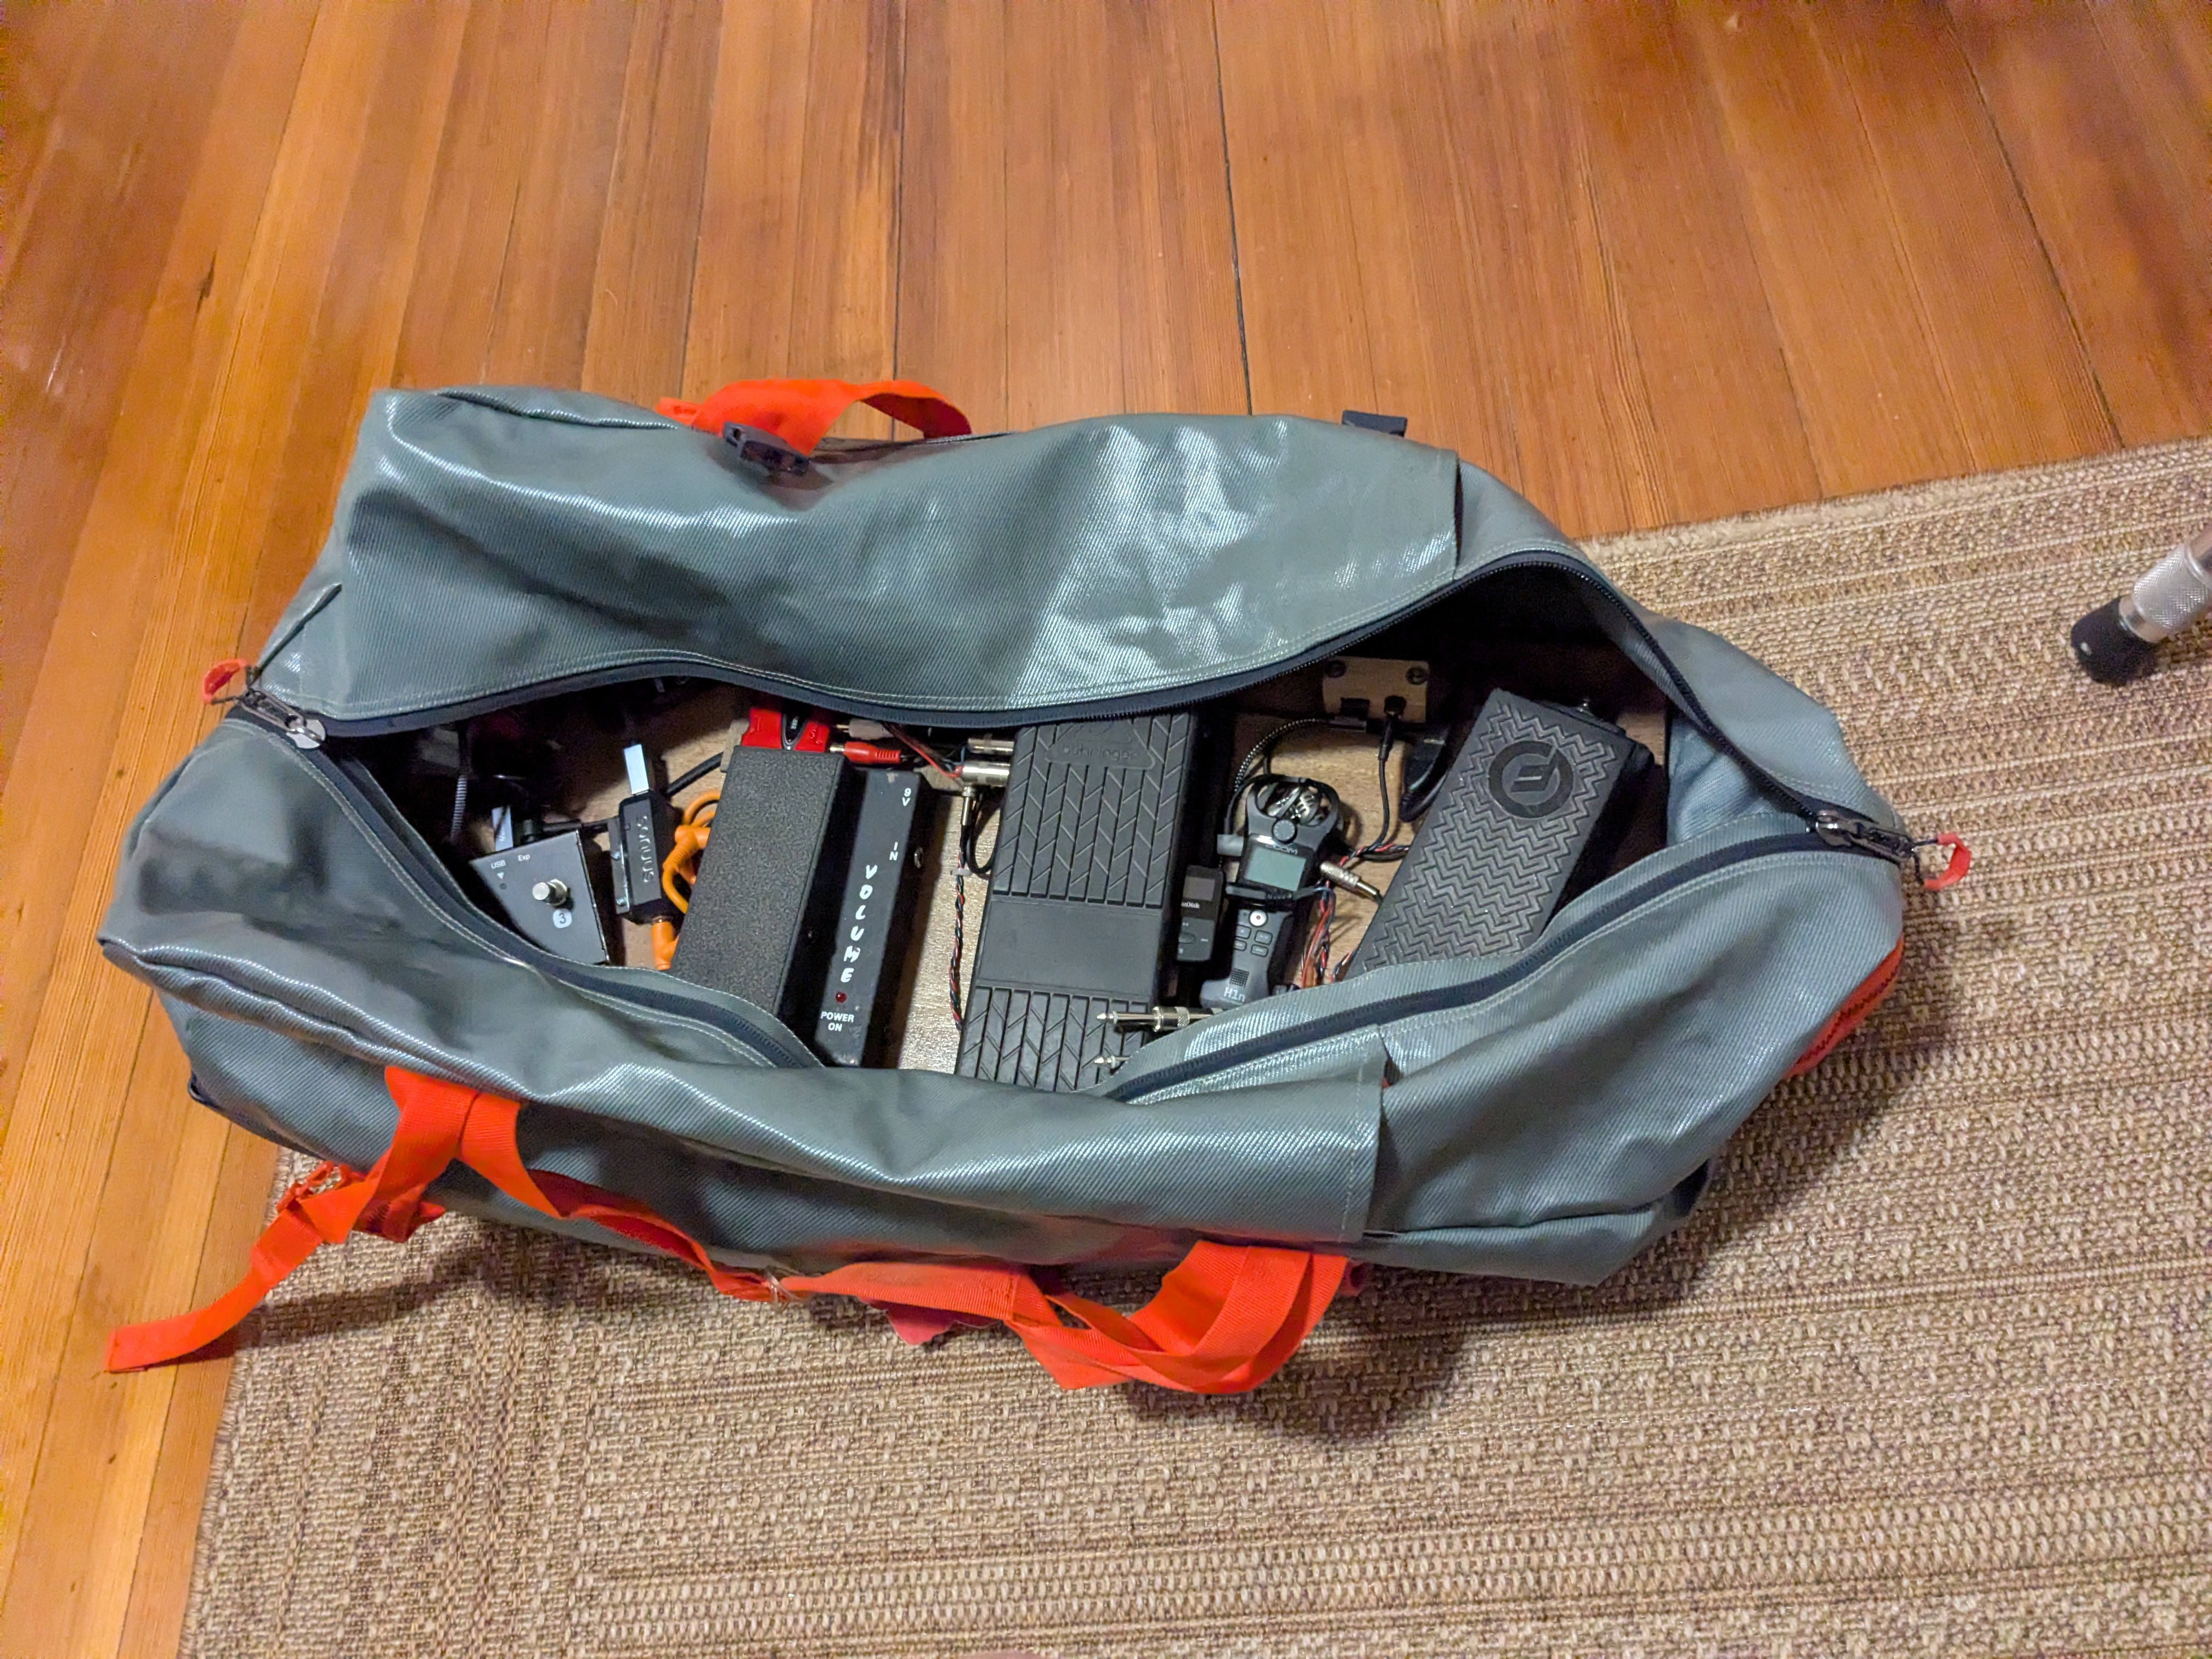
Flight cases (aka road cases) are absolutely the most secure, and essential if touring with a band, but I also wanted the option of being able to fit my pedalboard into some kind of standard luggage. Since standard luggage seems to usually max lengthwise at 30", the pedalboard should be max 29". Width was mostly determined by material availability. A 2'x 4' piece of 1/2" plywood cut in half the long way is 12". The other 29" half with the off cuts can make a protective lid. I chose dry 1/2" 5-ply birch plywood for lightweight strength.
After getting the wood, the first step was to screw four non-skid feet onto the bottom of the board. Everything else on the board needs to work around solidly mounted (screwed in) corner feet. The next step is to lay out the leftmost and rightmost pedalboard items, then start to come up with a full layout for everything that balances all the constraints. The pedalboard needs to work ergonomically, meet or exceed basic pro audio standards, and be durable.
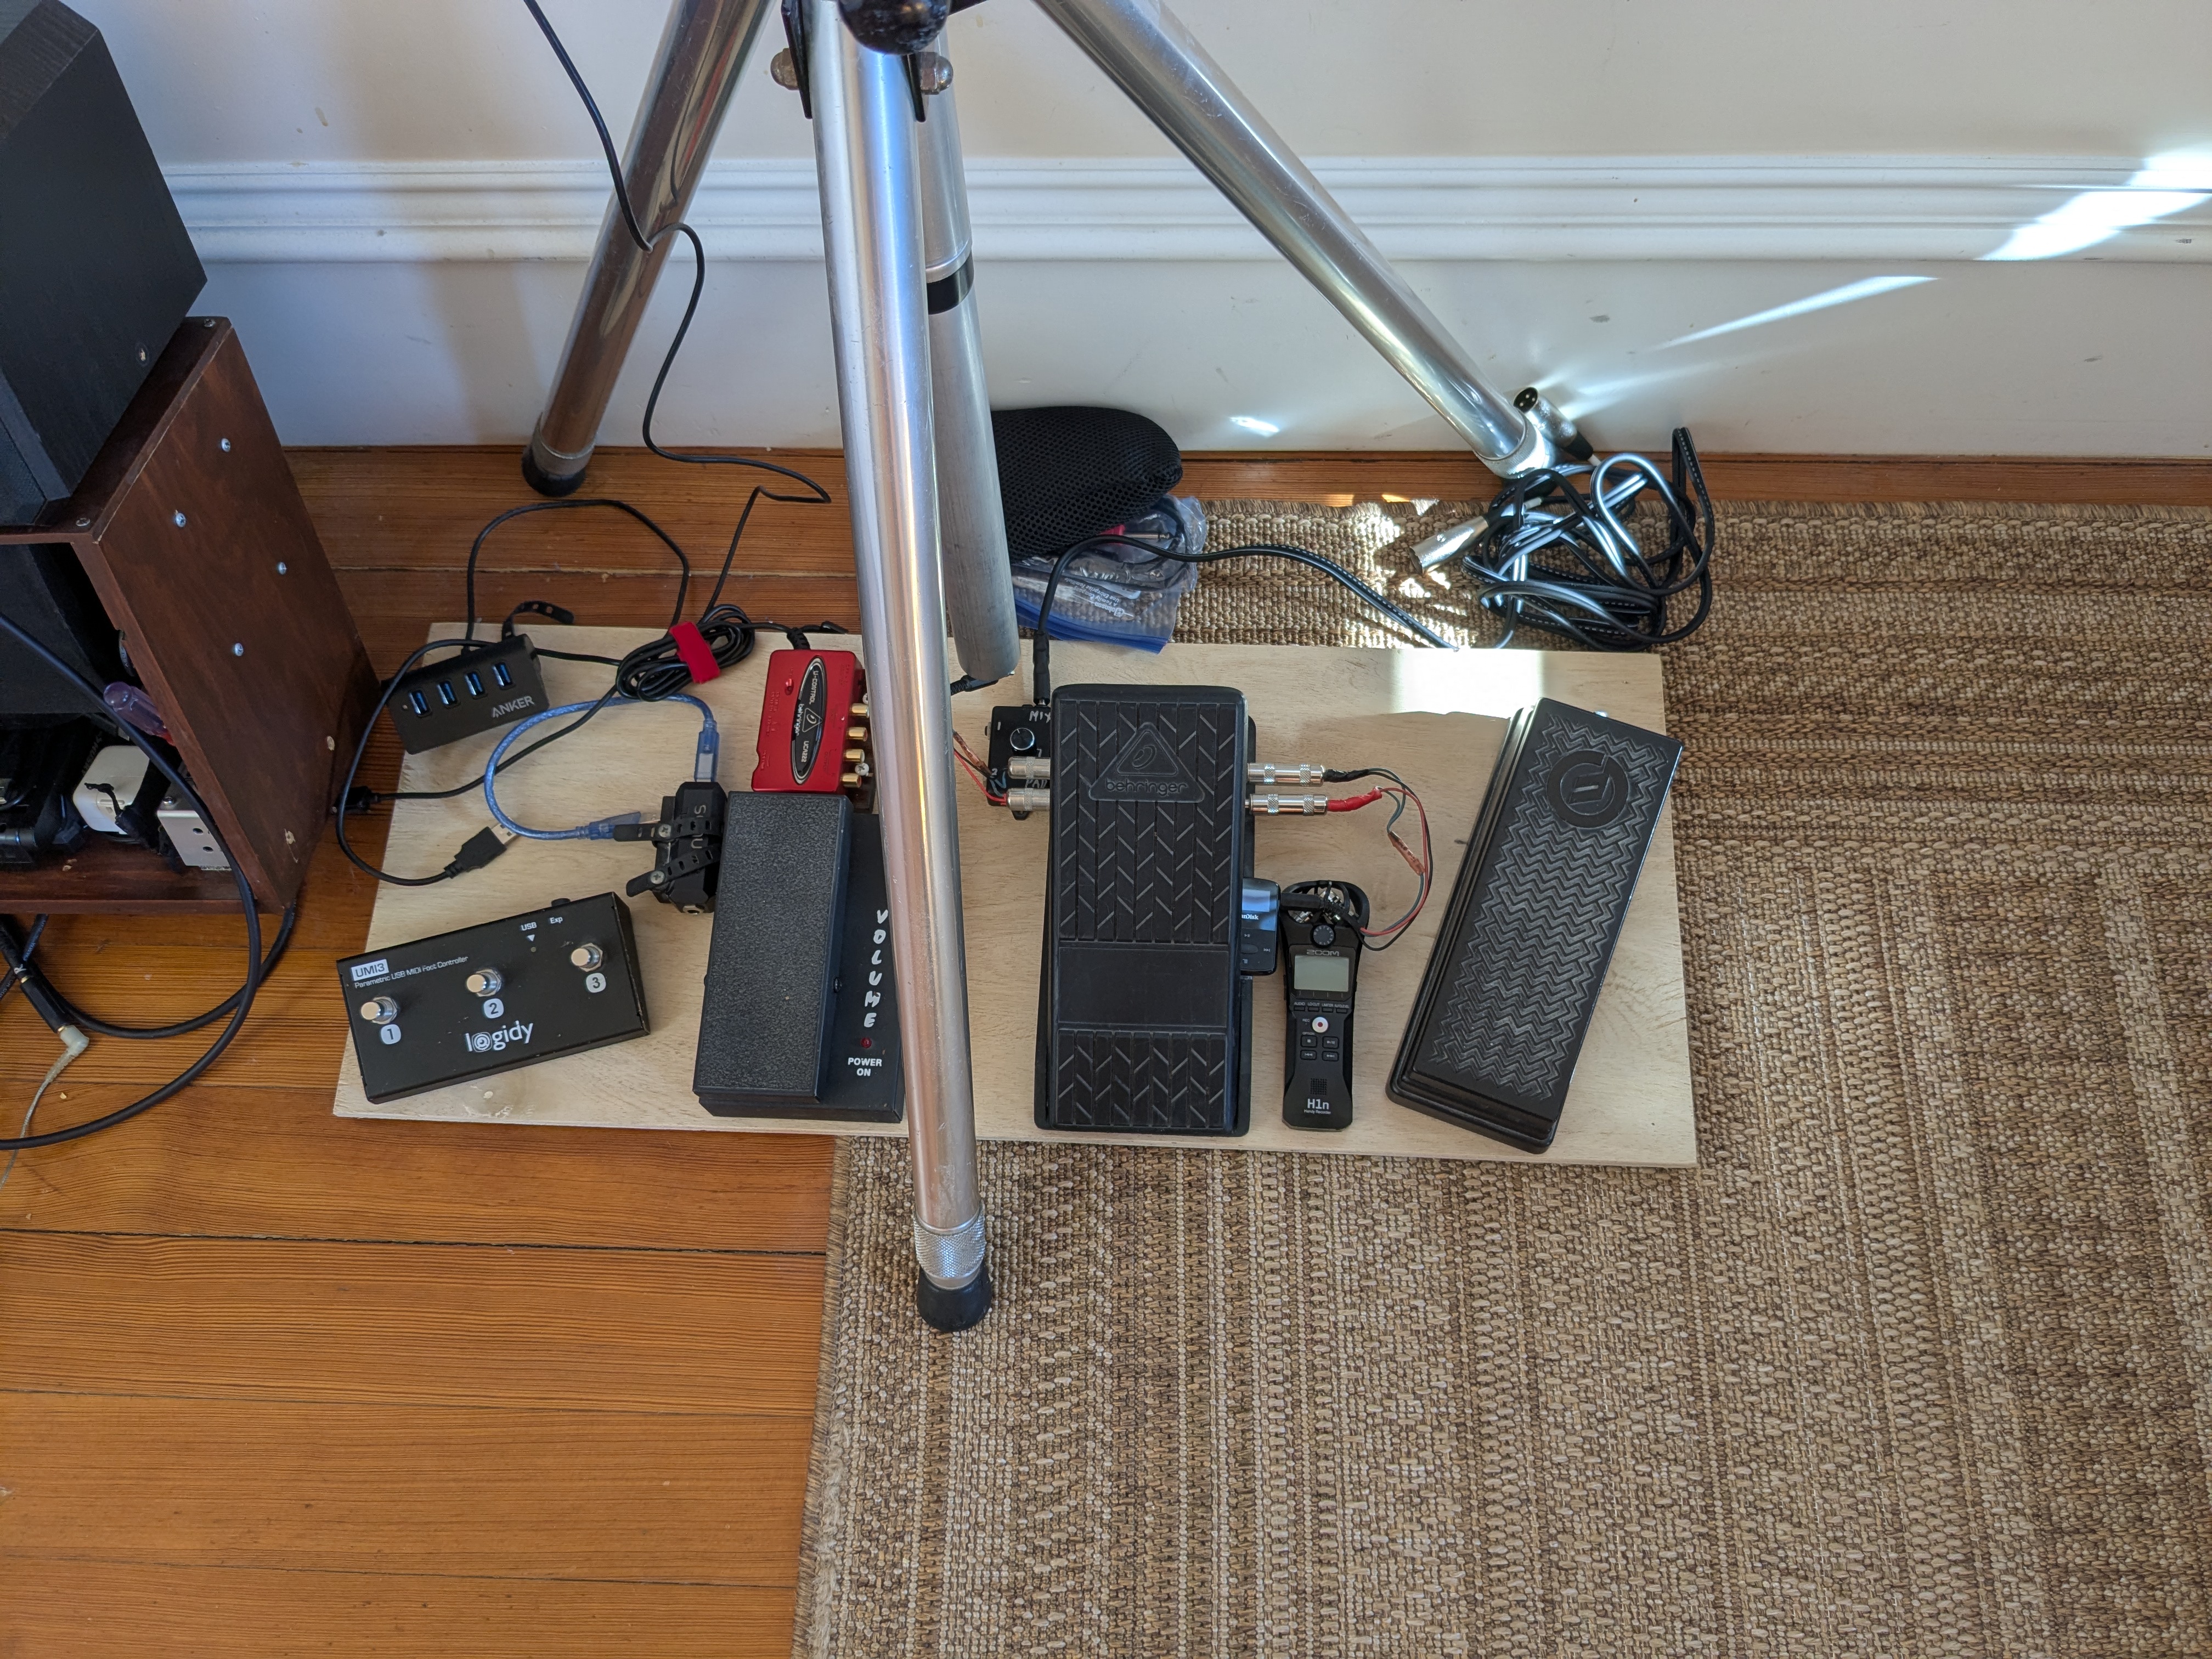
Looks like plenty of room, but I'm going to use pretty much all of this for cables and connections. Nevertheless the first step is to get the edge components mounted, which leads to mounting strategies. Before getting into that, it's important to get some polyurethane onto the whole board so it's less likely to crack, stain, or delaminate in use. A good poly coating also provides a solid adhesion surface for any velcro.
Mounting strategy #1: Screwed on from underneath
Decide on what size machine screws you will be using, and get a matching drill/tap. I'm using M4-0.7 20-25mm screws. A 4mmX0.70 tap can be done using a 1/8" drill hole, but it's best to get a matching tap and drill bit pair. Use a tap wrench for proper angle and pressure. I usually hold the plate in my hand while tapping it, the pic is like that so I can hold the phone. Drill and tap the first mounting screw, then the second with the first screw in, then the remaining two with first two screws in. Be sure to position the holes where there is space without interfering with the internals of the pedal.
Drill through metal slowly. If you heat up the drill bit it will lose its edge and you'll have to get a new one. You probably already knew that, but it's always worth a reminder.
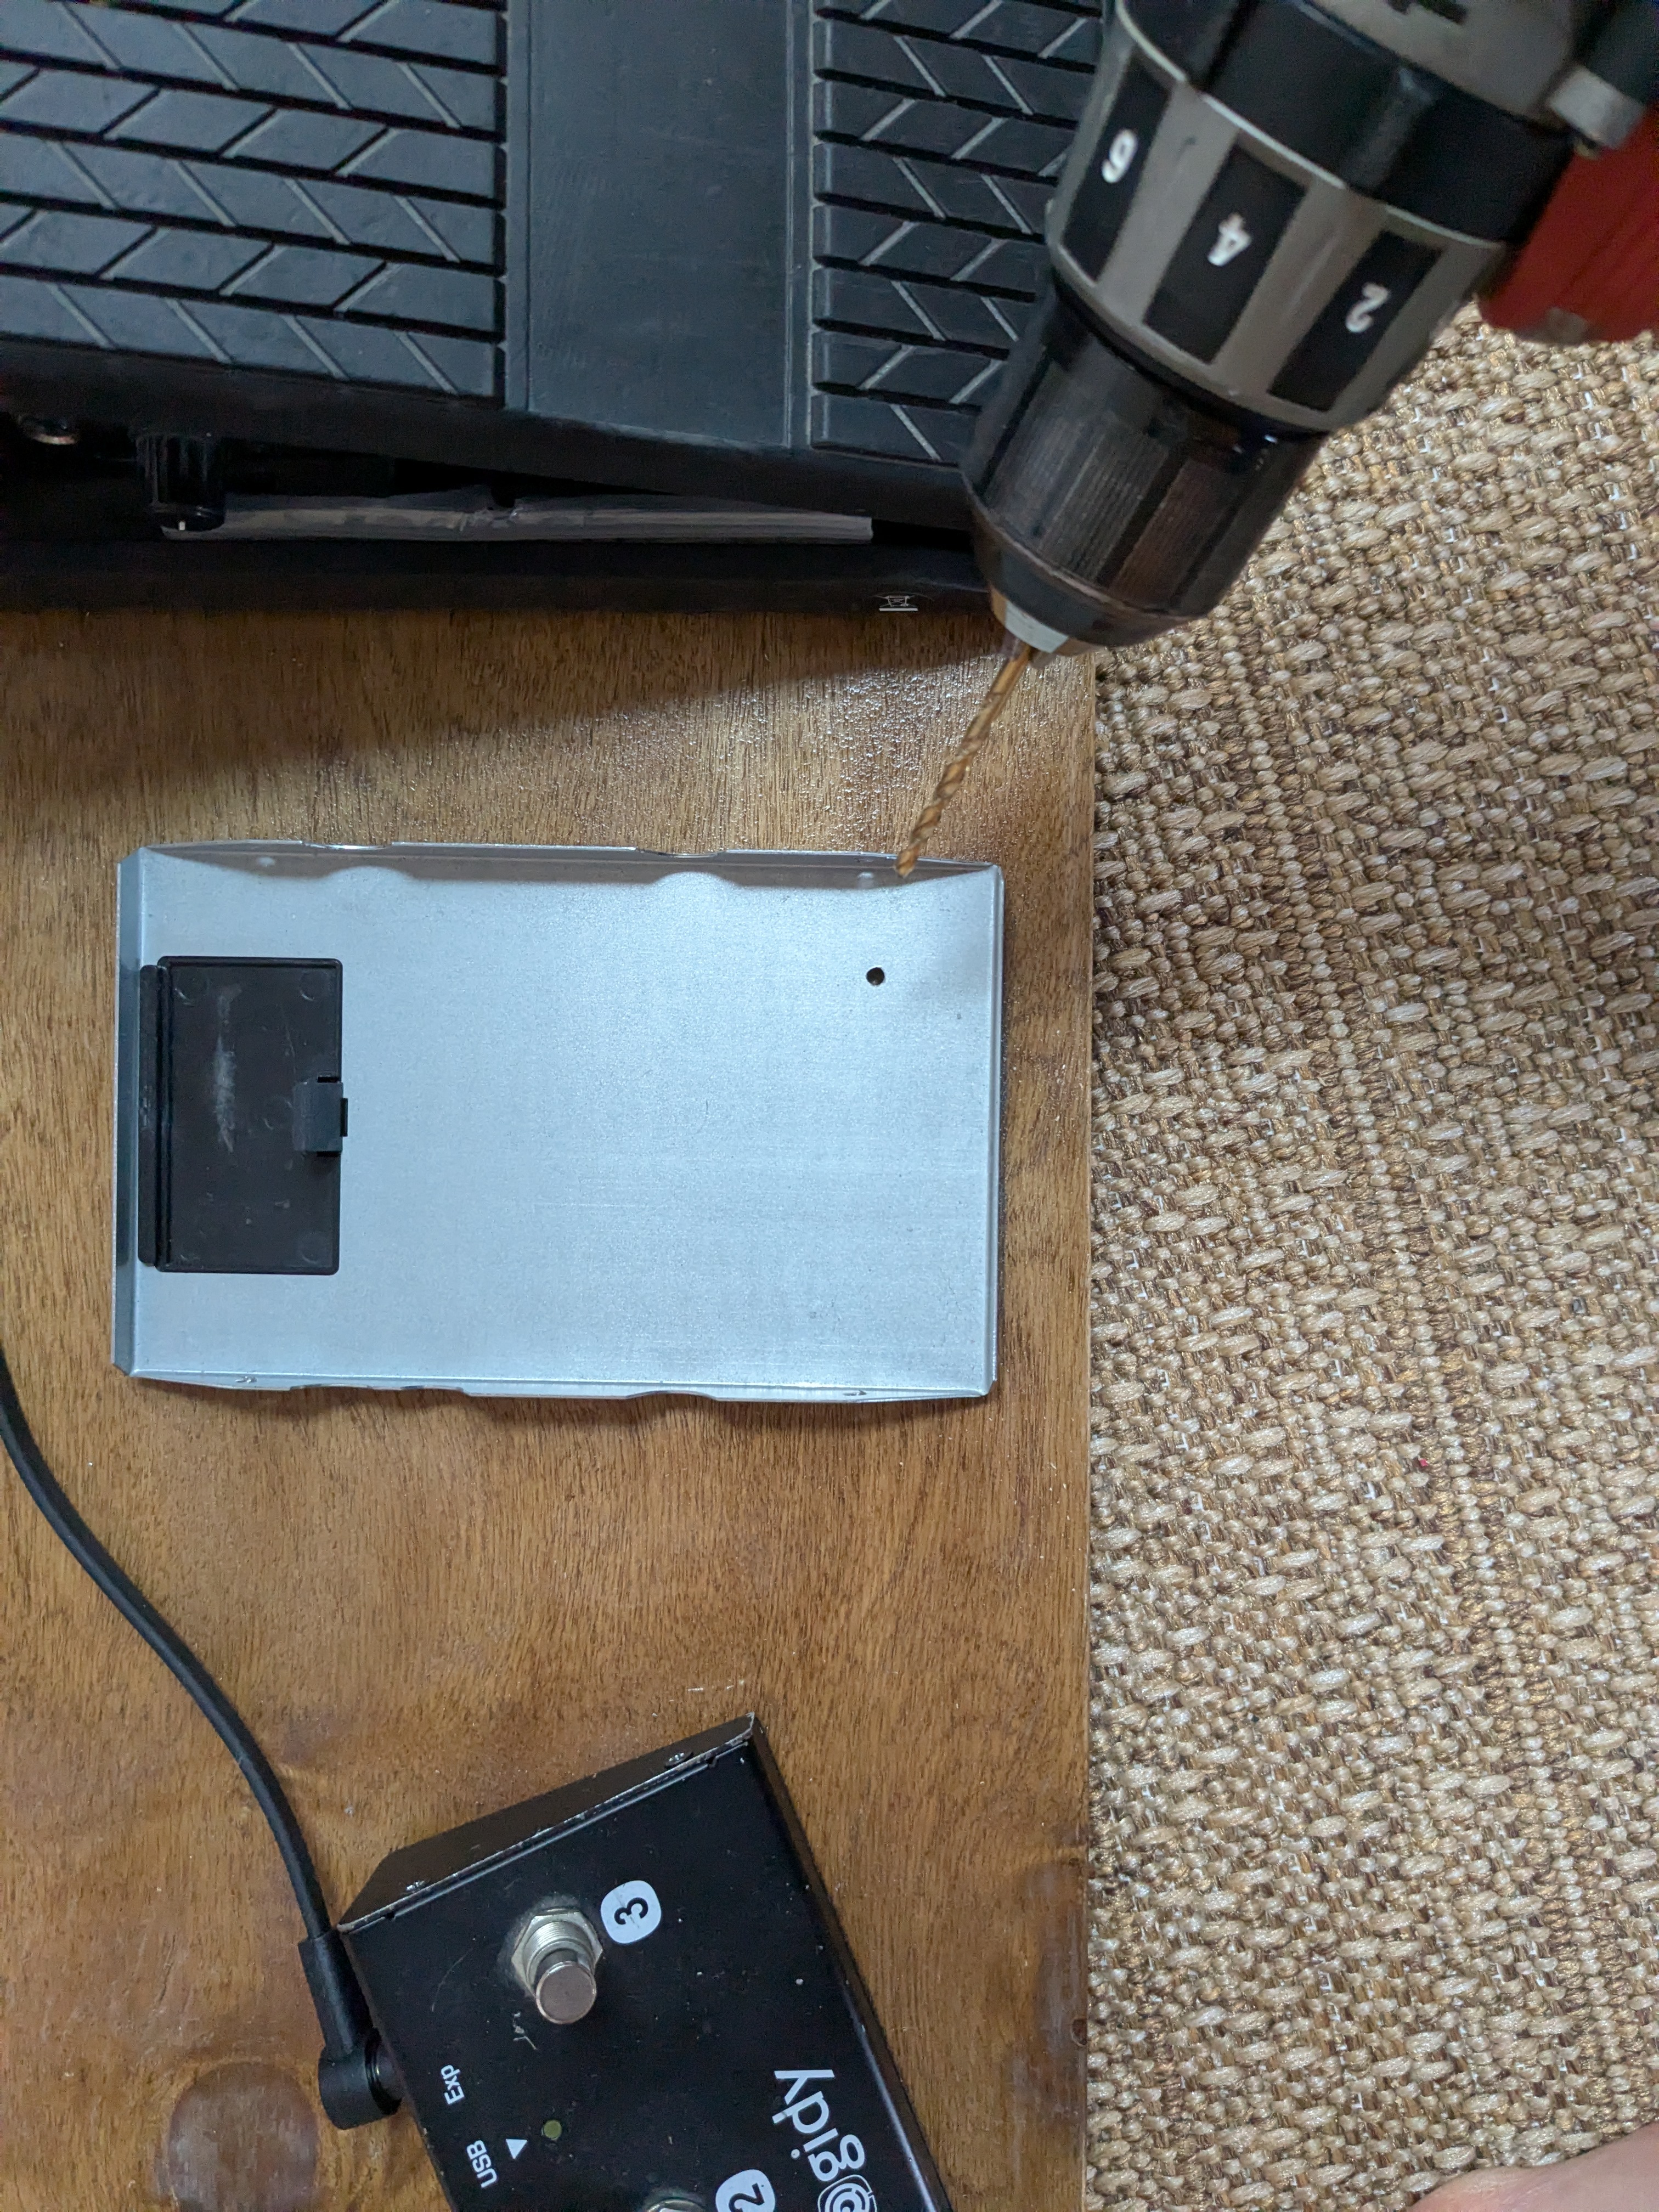
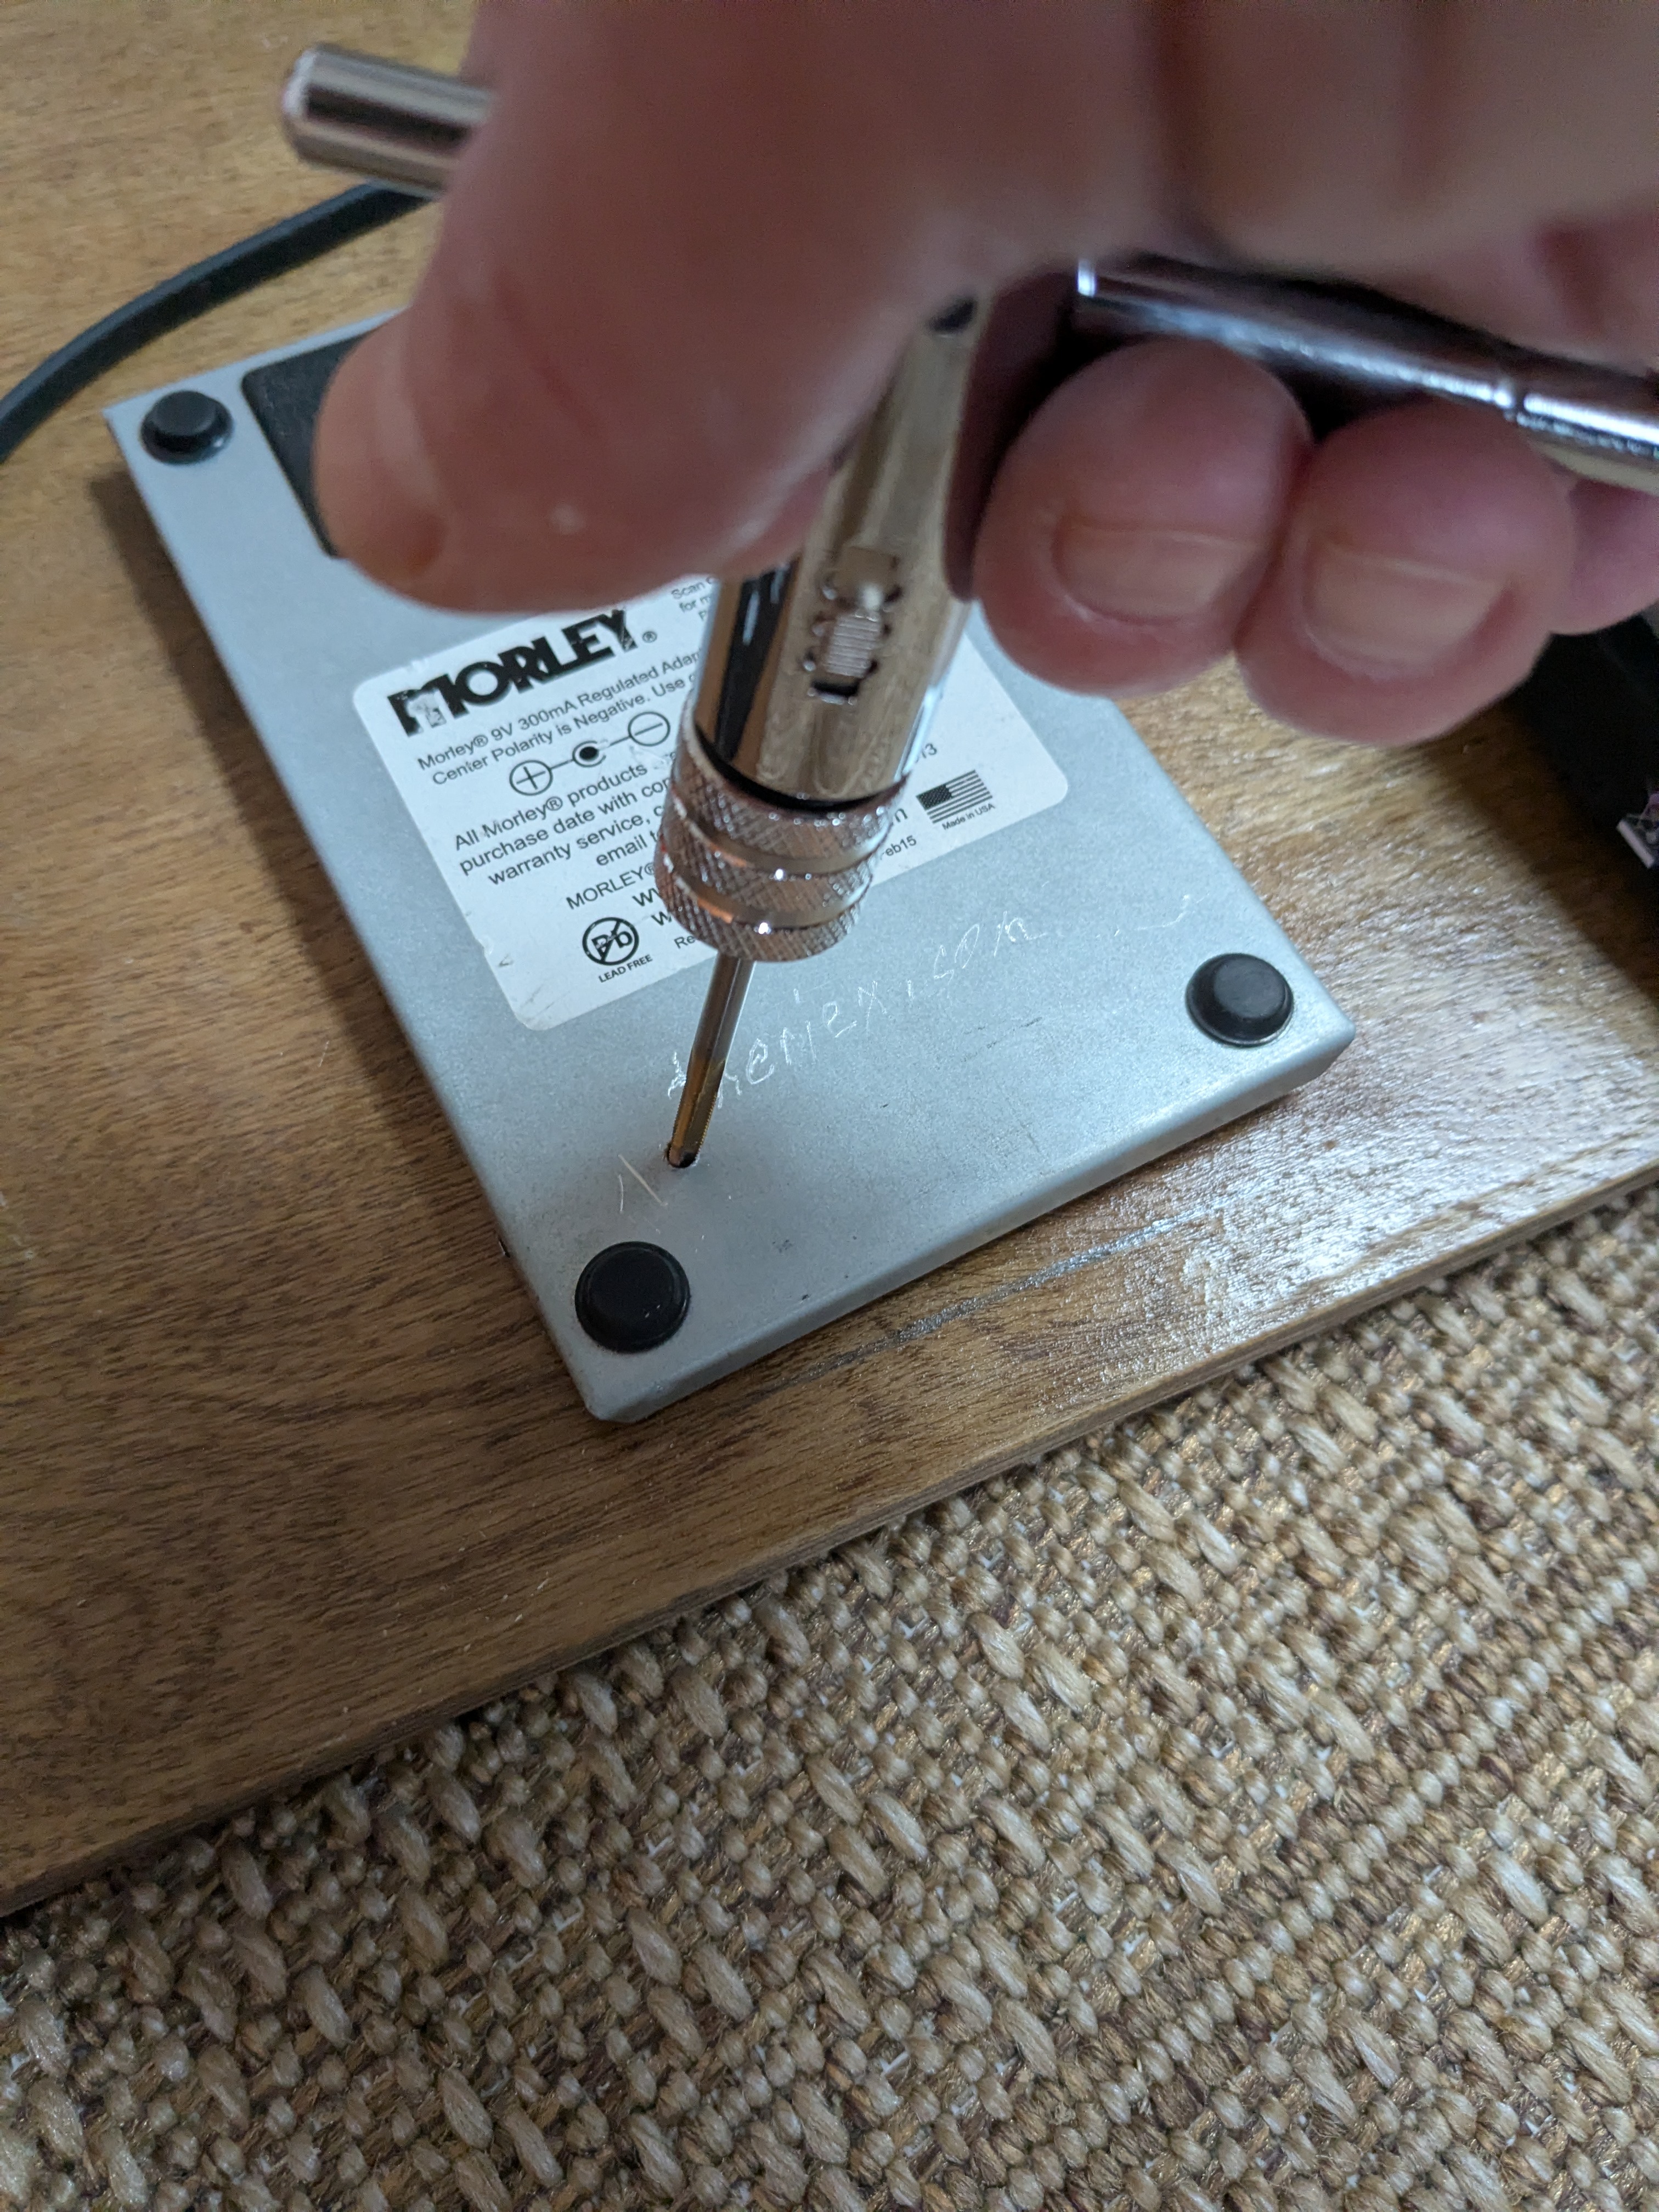
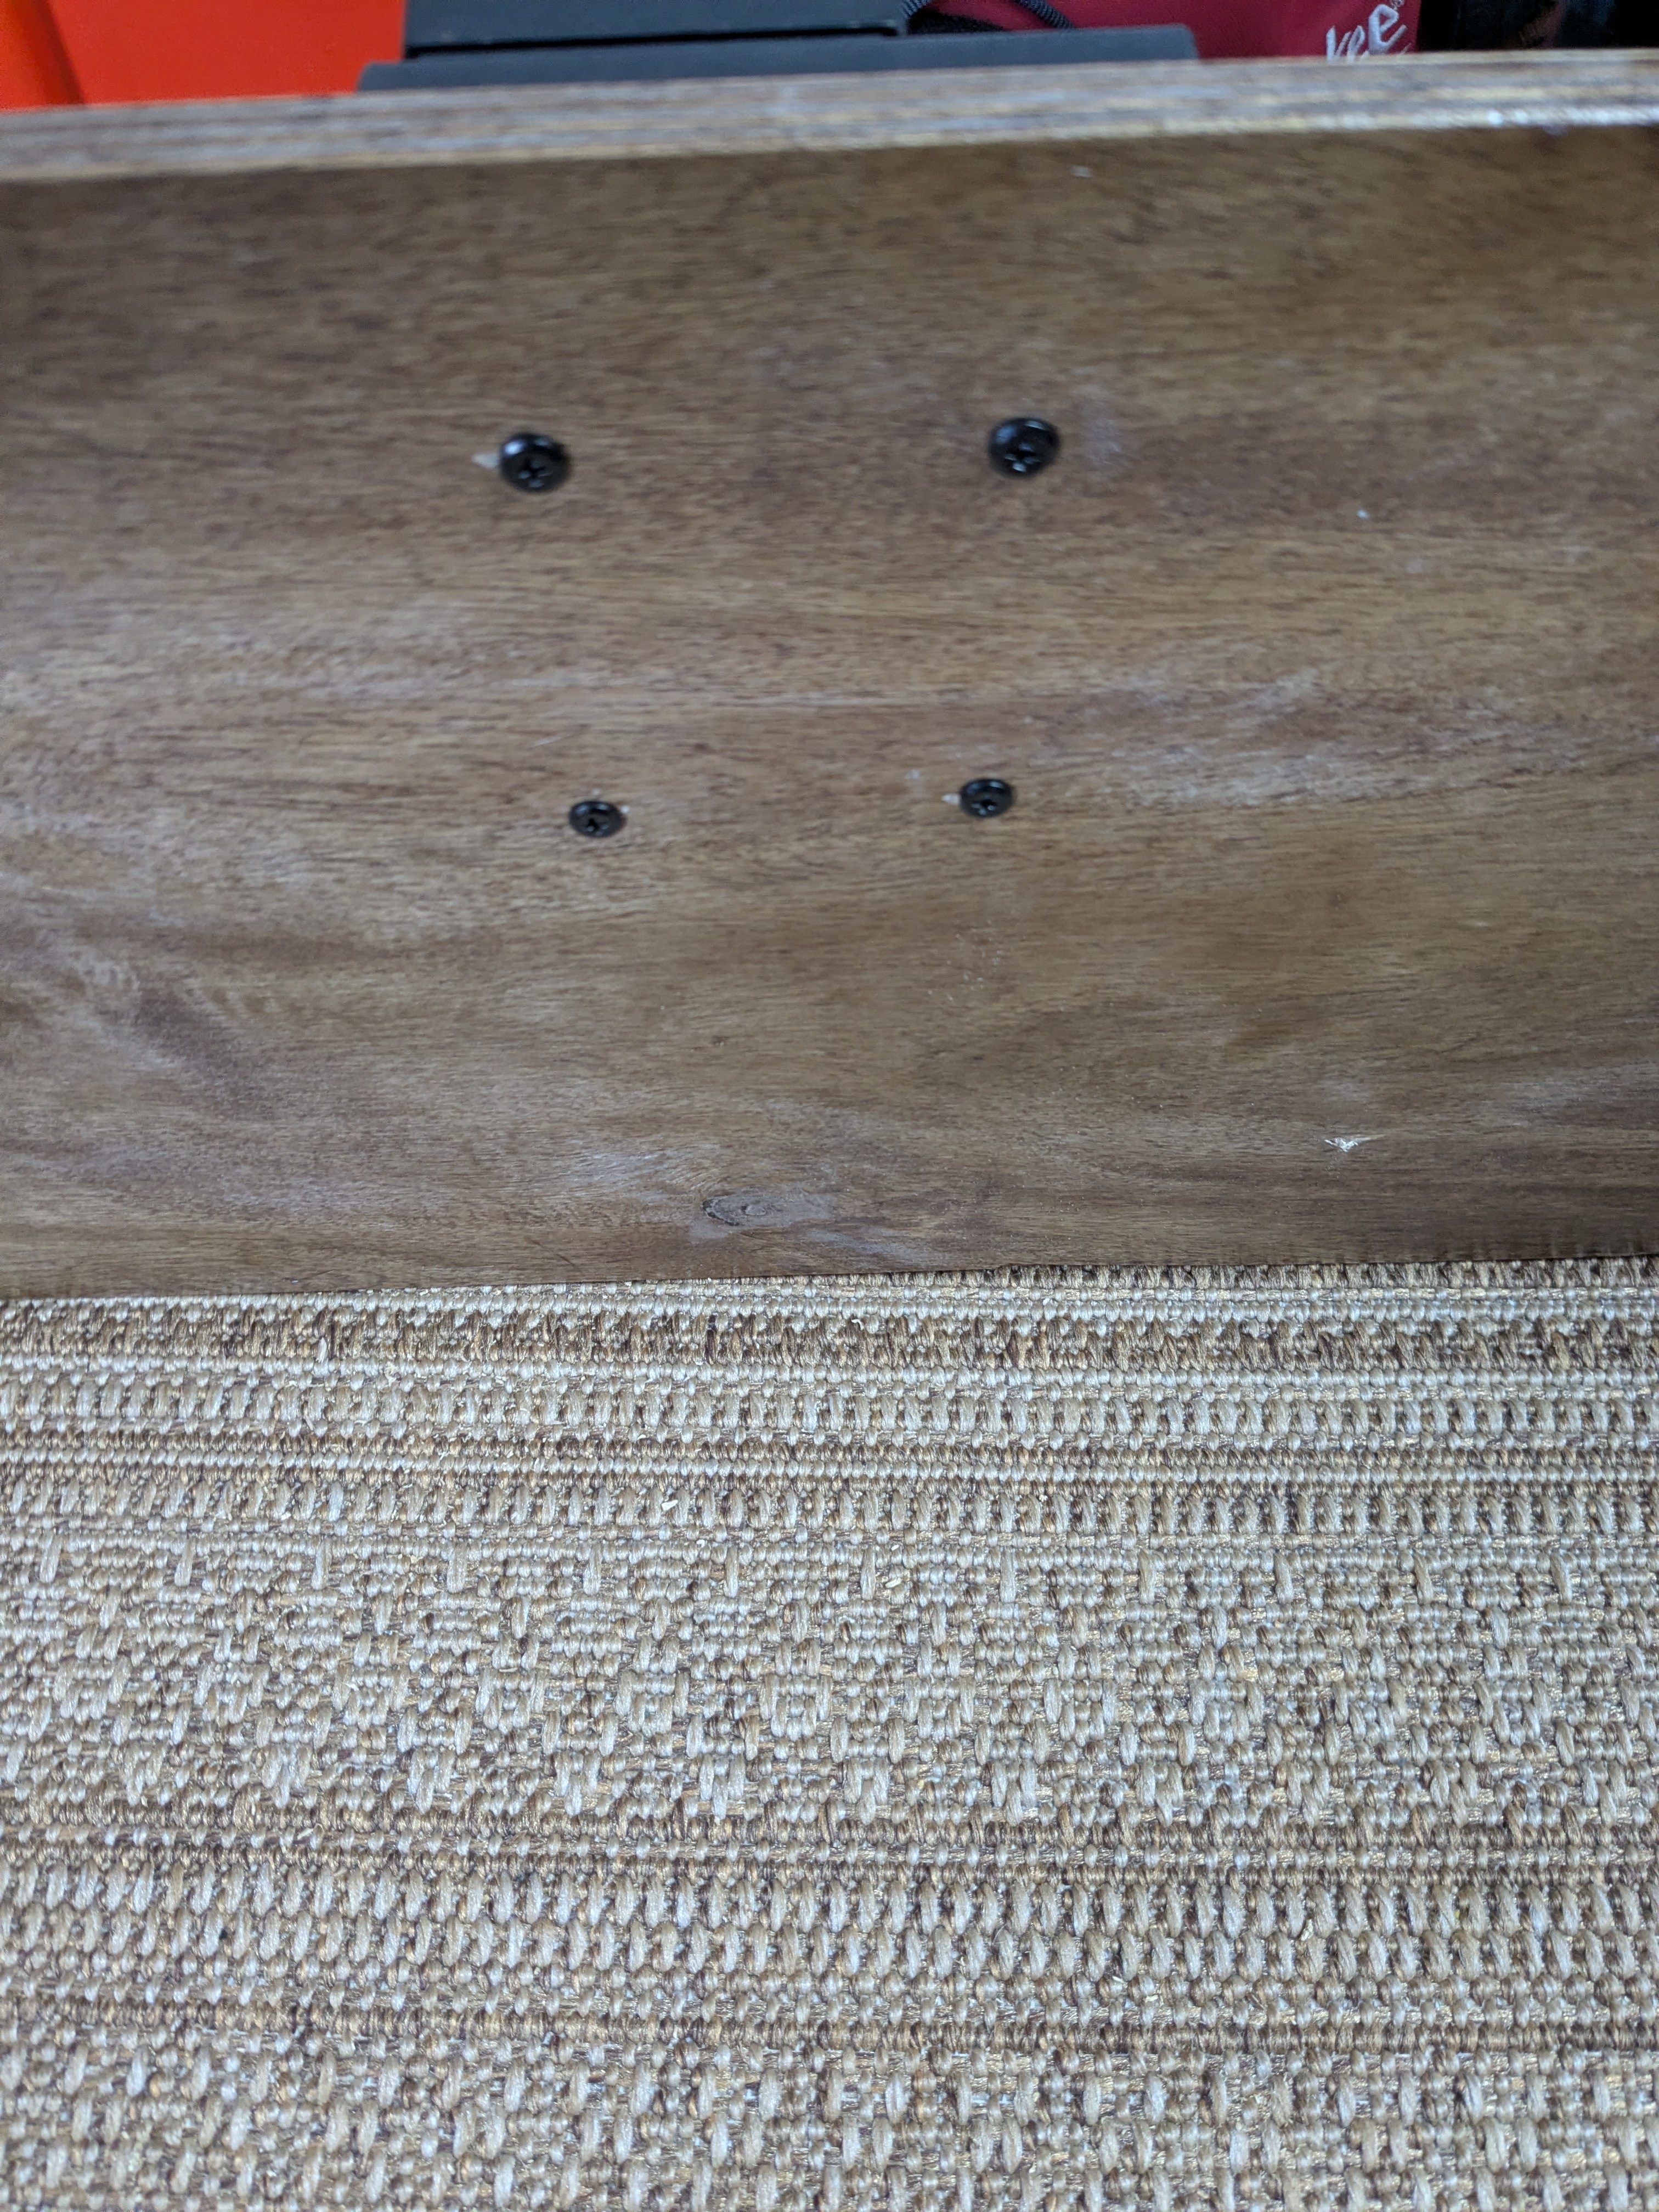
The Logidy, Morley and Moog pedals were screwed on from underneath. The Zoom has a camera mounting screw, so it is also held on from underneath but no drill and tap needed.
Mounting strategy #2: Screwed down from above
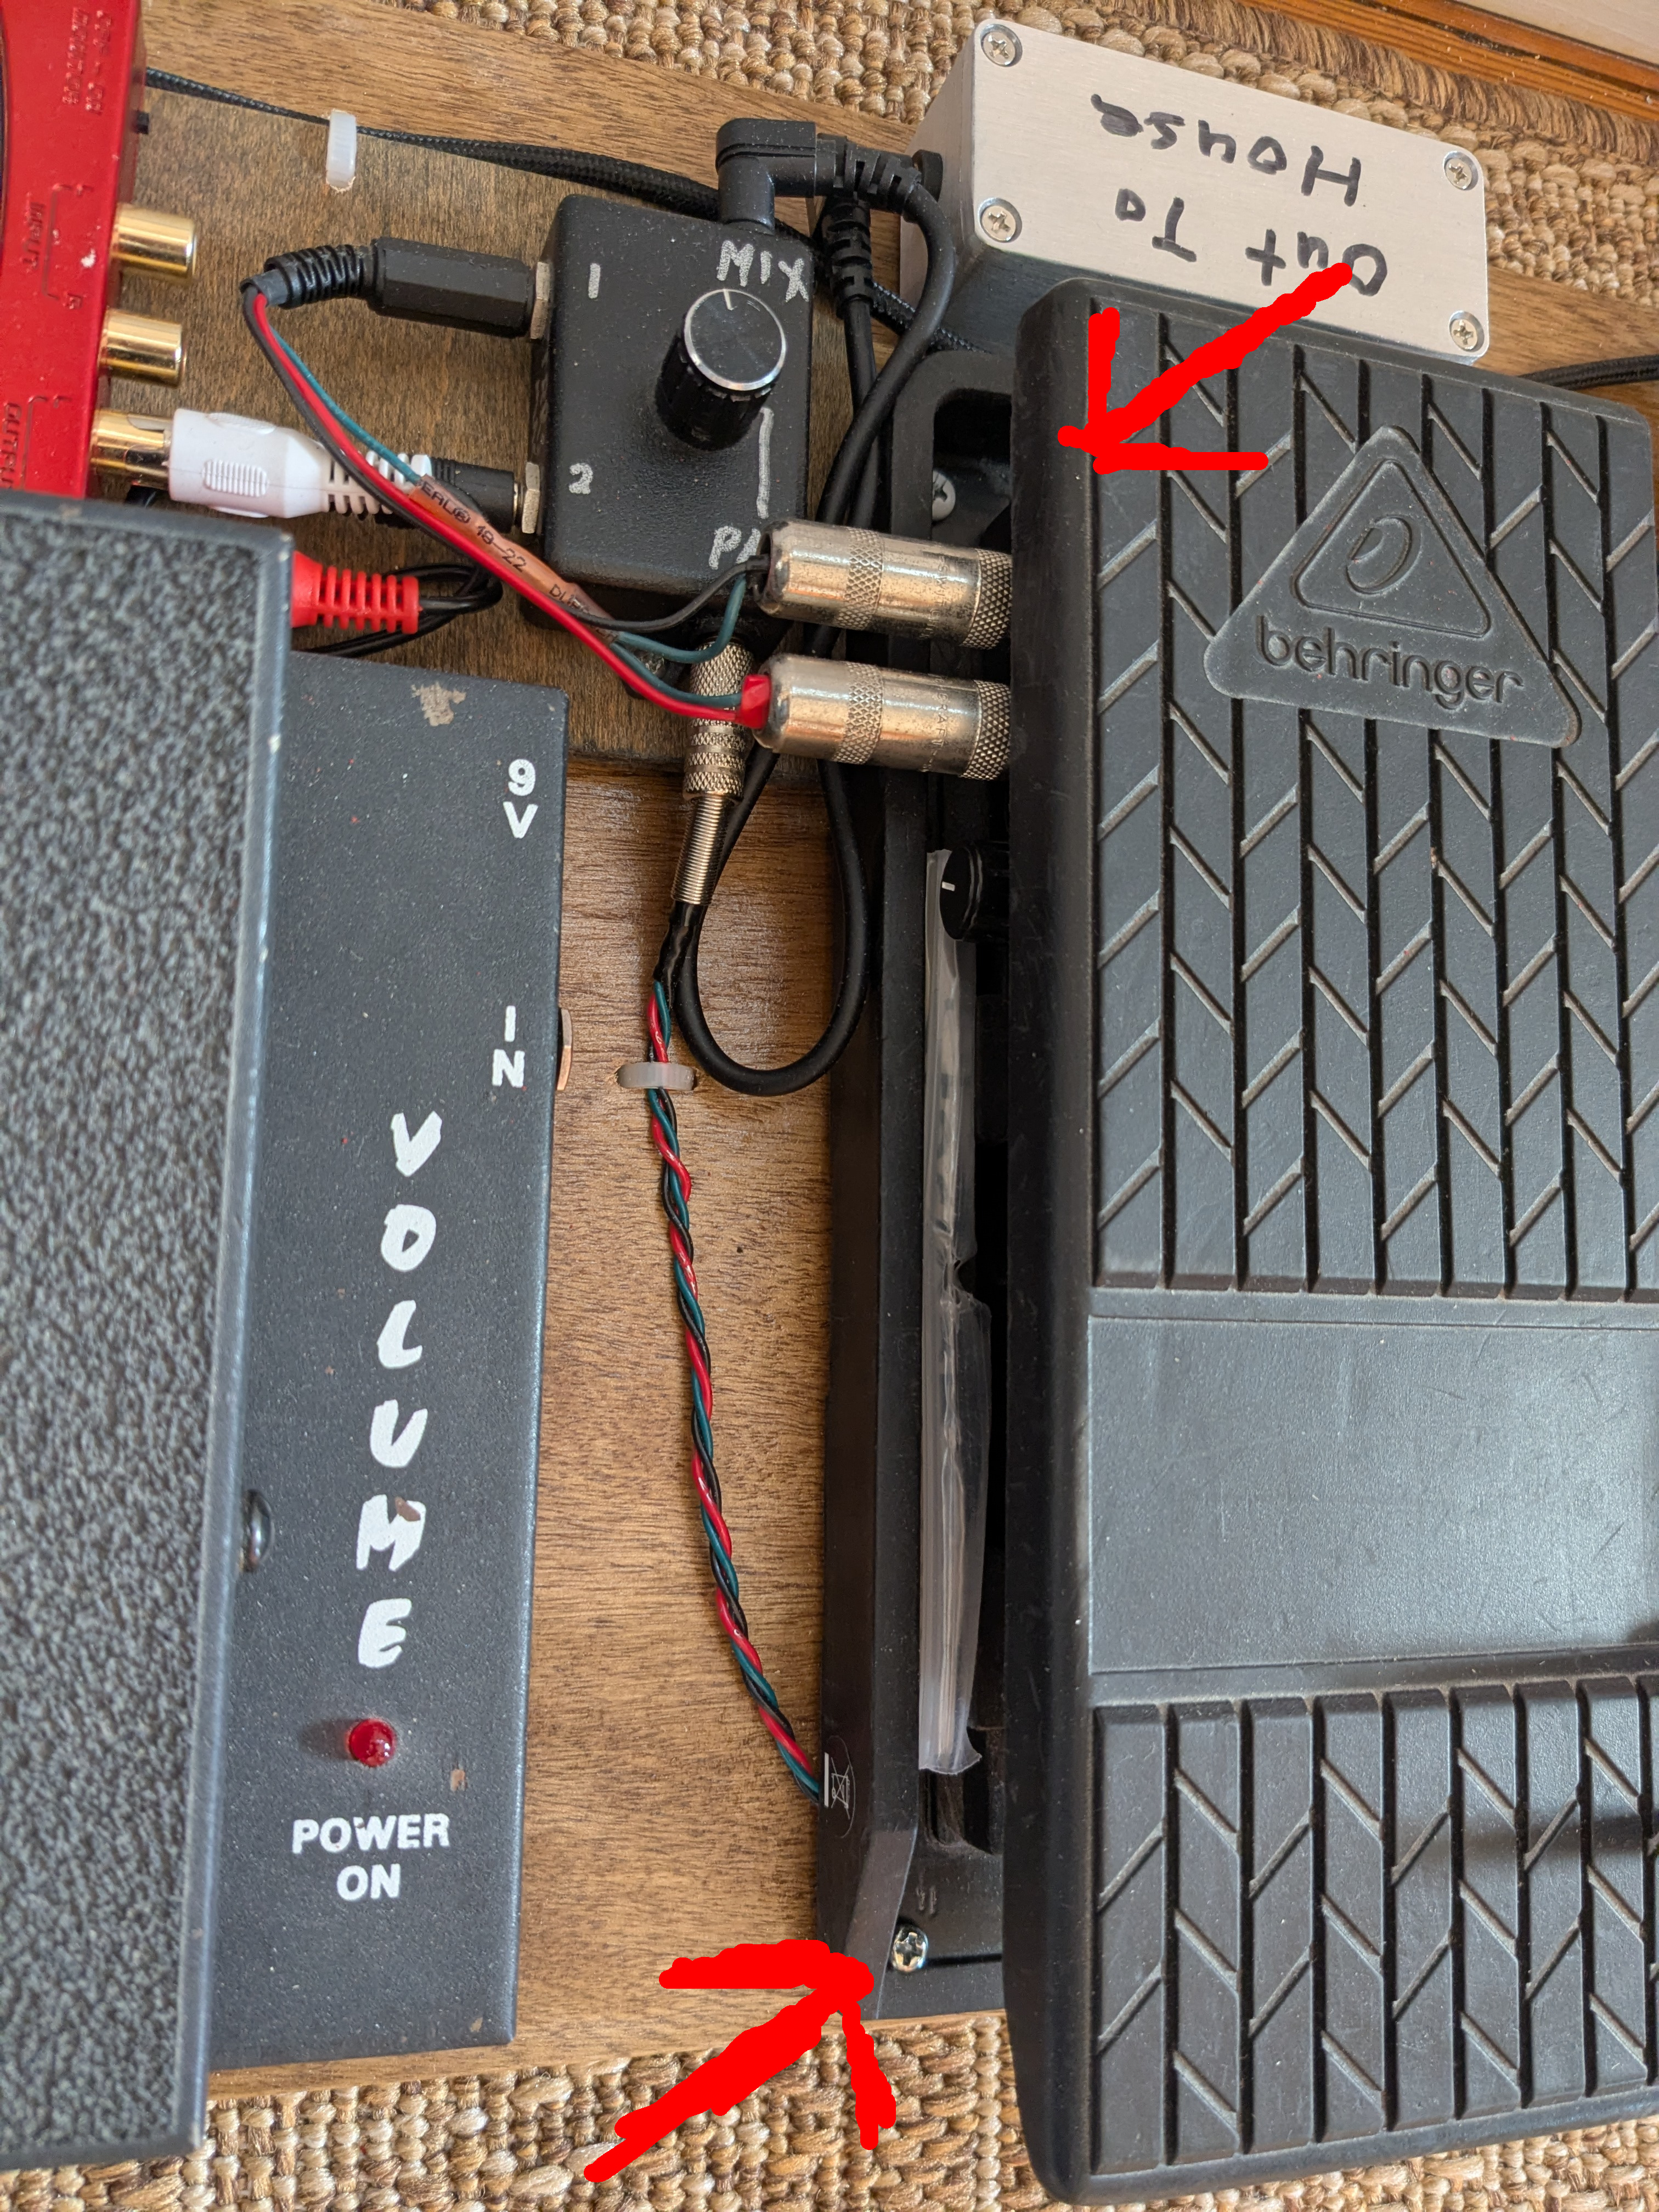
The Behringer stereo volume pedal base extends beyond the pedal and there's not a lot of space inside, so I drilled 4 holes in the outside flange and screwed it down to the board using standard wood screws. I pulled the baseplate off to drill the holes, then put the screws in directly with a screwdriver. Can be unmounted by unscrewing from the top when the battery needs to be replaced about once a year or so.
The pads on the underside of the pedal have enough space between them to fit a small cable without stressing it. In this case having the cable underfoot is actually the most protected place it can be.
That's a custom built TRS cable with TRRS connectors wired with no mic connection. Makes it clear there are no pedalboard mic/ground shorts involved in the mixer connections.
Mounting strategy #3: Hybrid floating plate
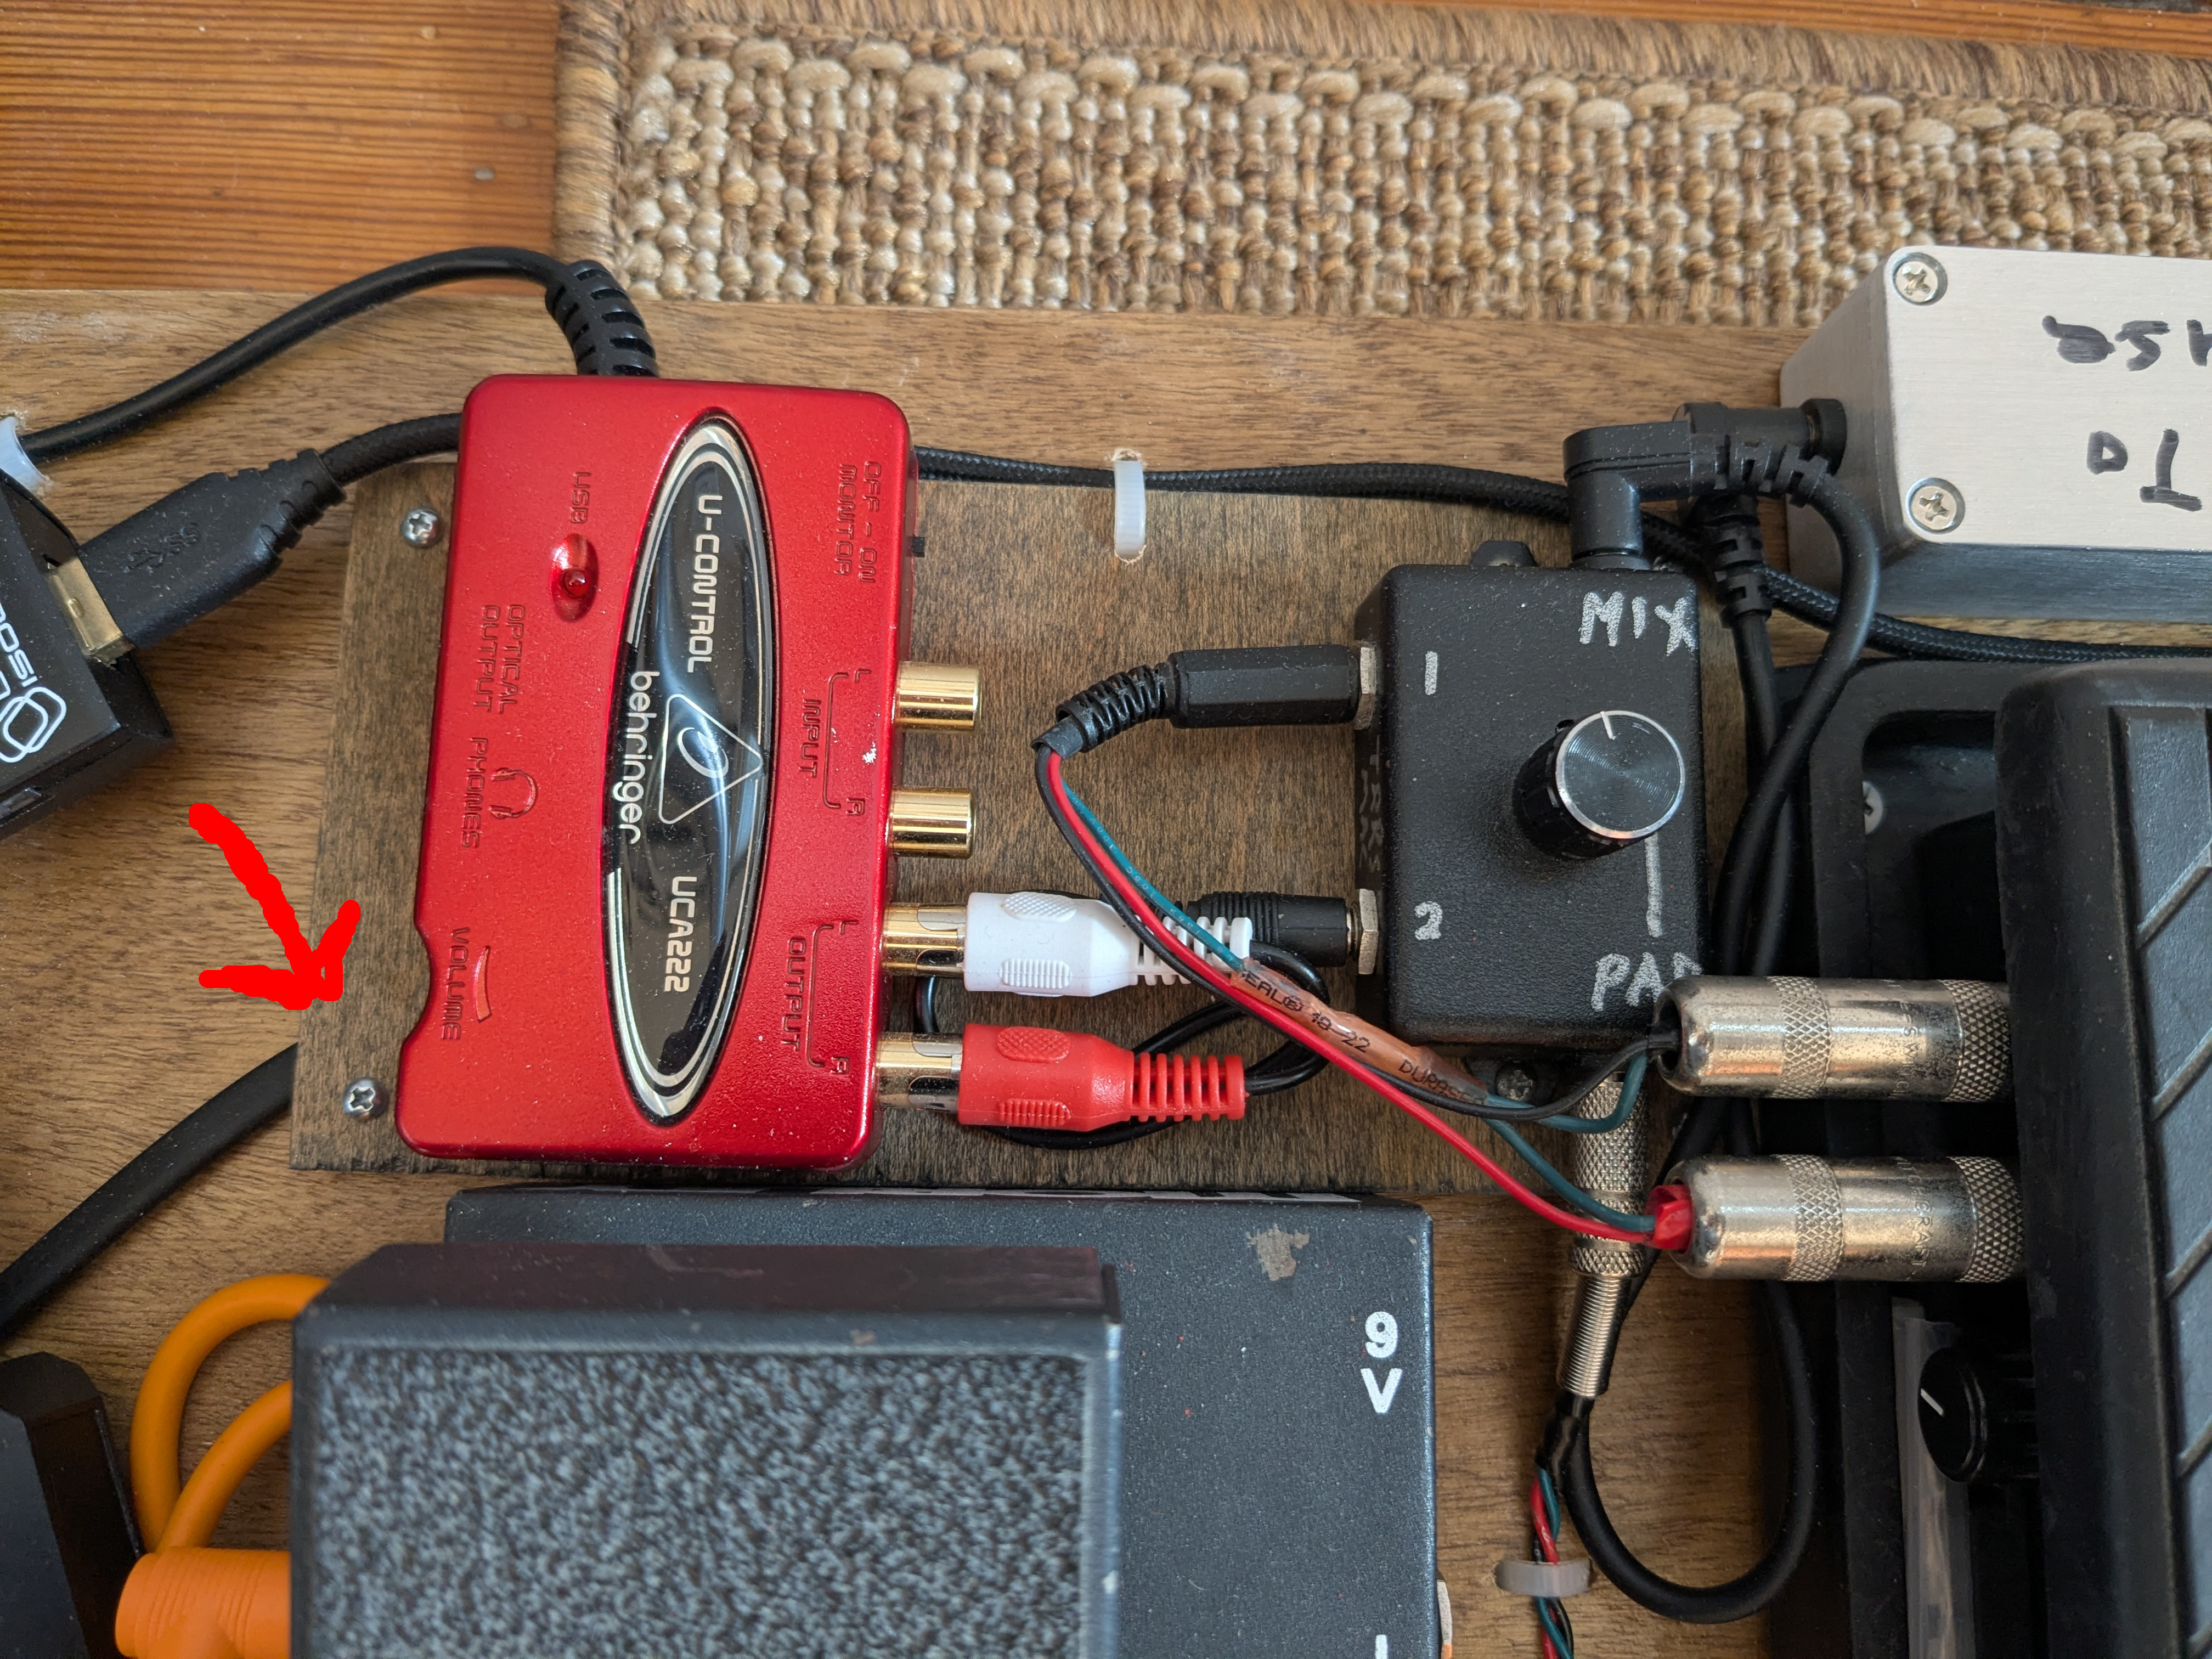
The UCA222 and the mixer are both plastic, lightweight, and comparatively delicate. The cable connecting the Logidy footswitch and the Moog expression pedal needs to go past them on the board. The solution is a 1/8" piece of plywood screwed down onto the main pedalboard through 4 rubber feet providing enough space for the cable to pass underneath.
The UCA222 is mounted from below. Its bottom plate is held on with two screws, and I found two longer screws with equivalent thread to screw in from underneath. The passive mixer is held on with two screws from above through the flanges provided by the project box.
The arrow points towards one of the floating plate mounting screws and the cable passing through underneath the plate.
Mounting strategy #4: Silicone adhesive 'L' mount plate
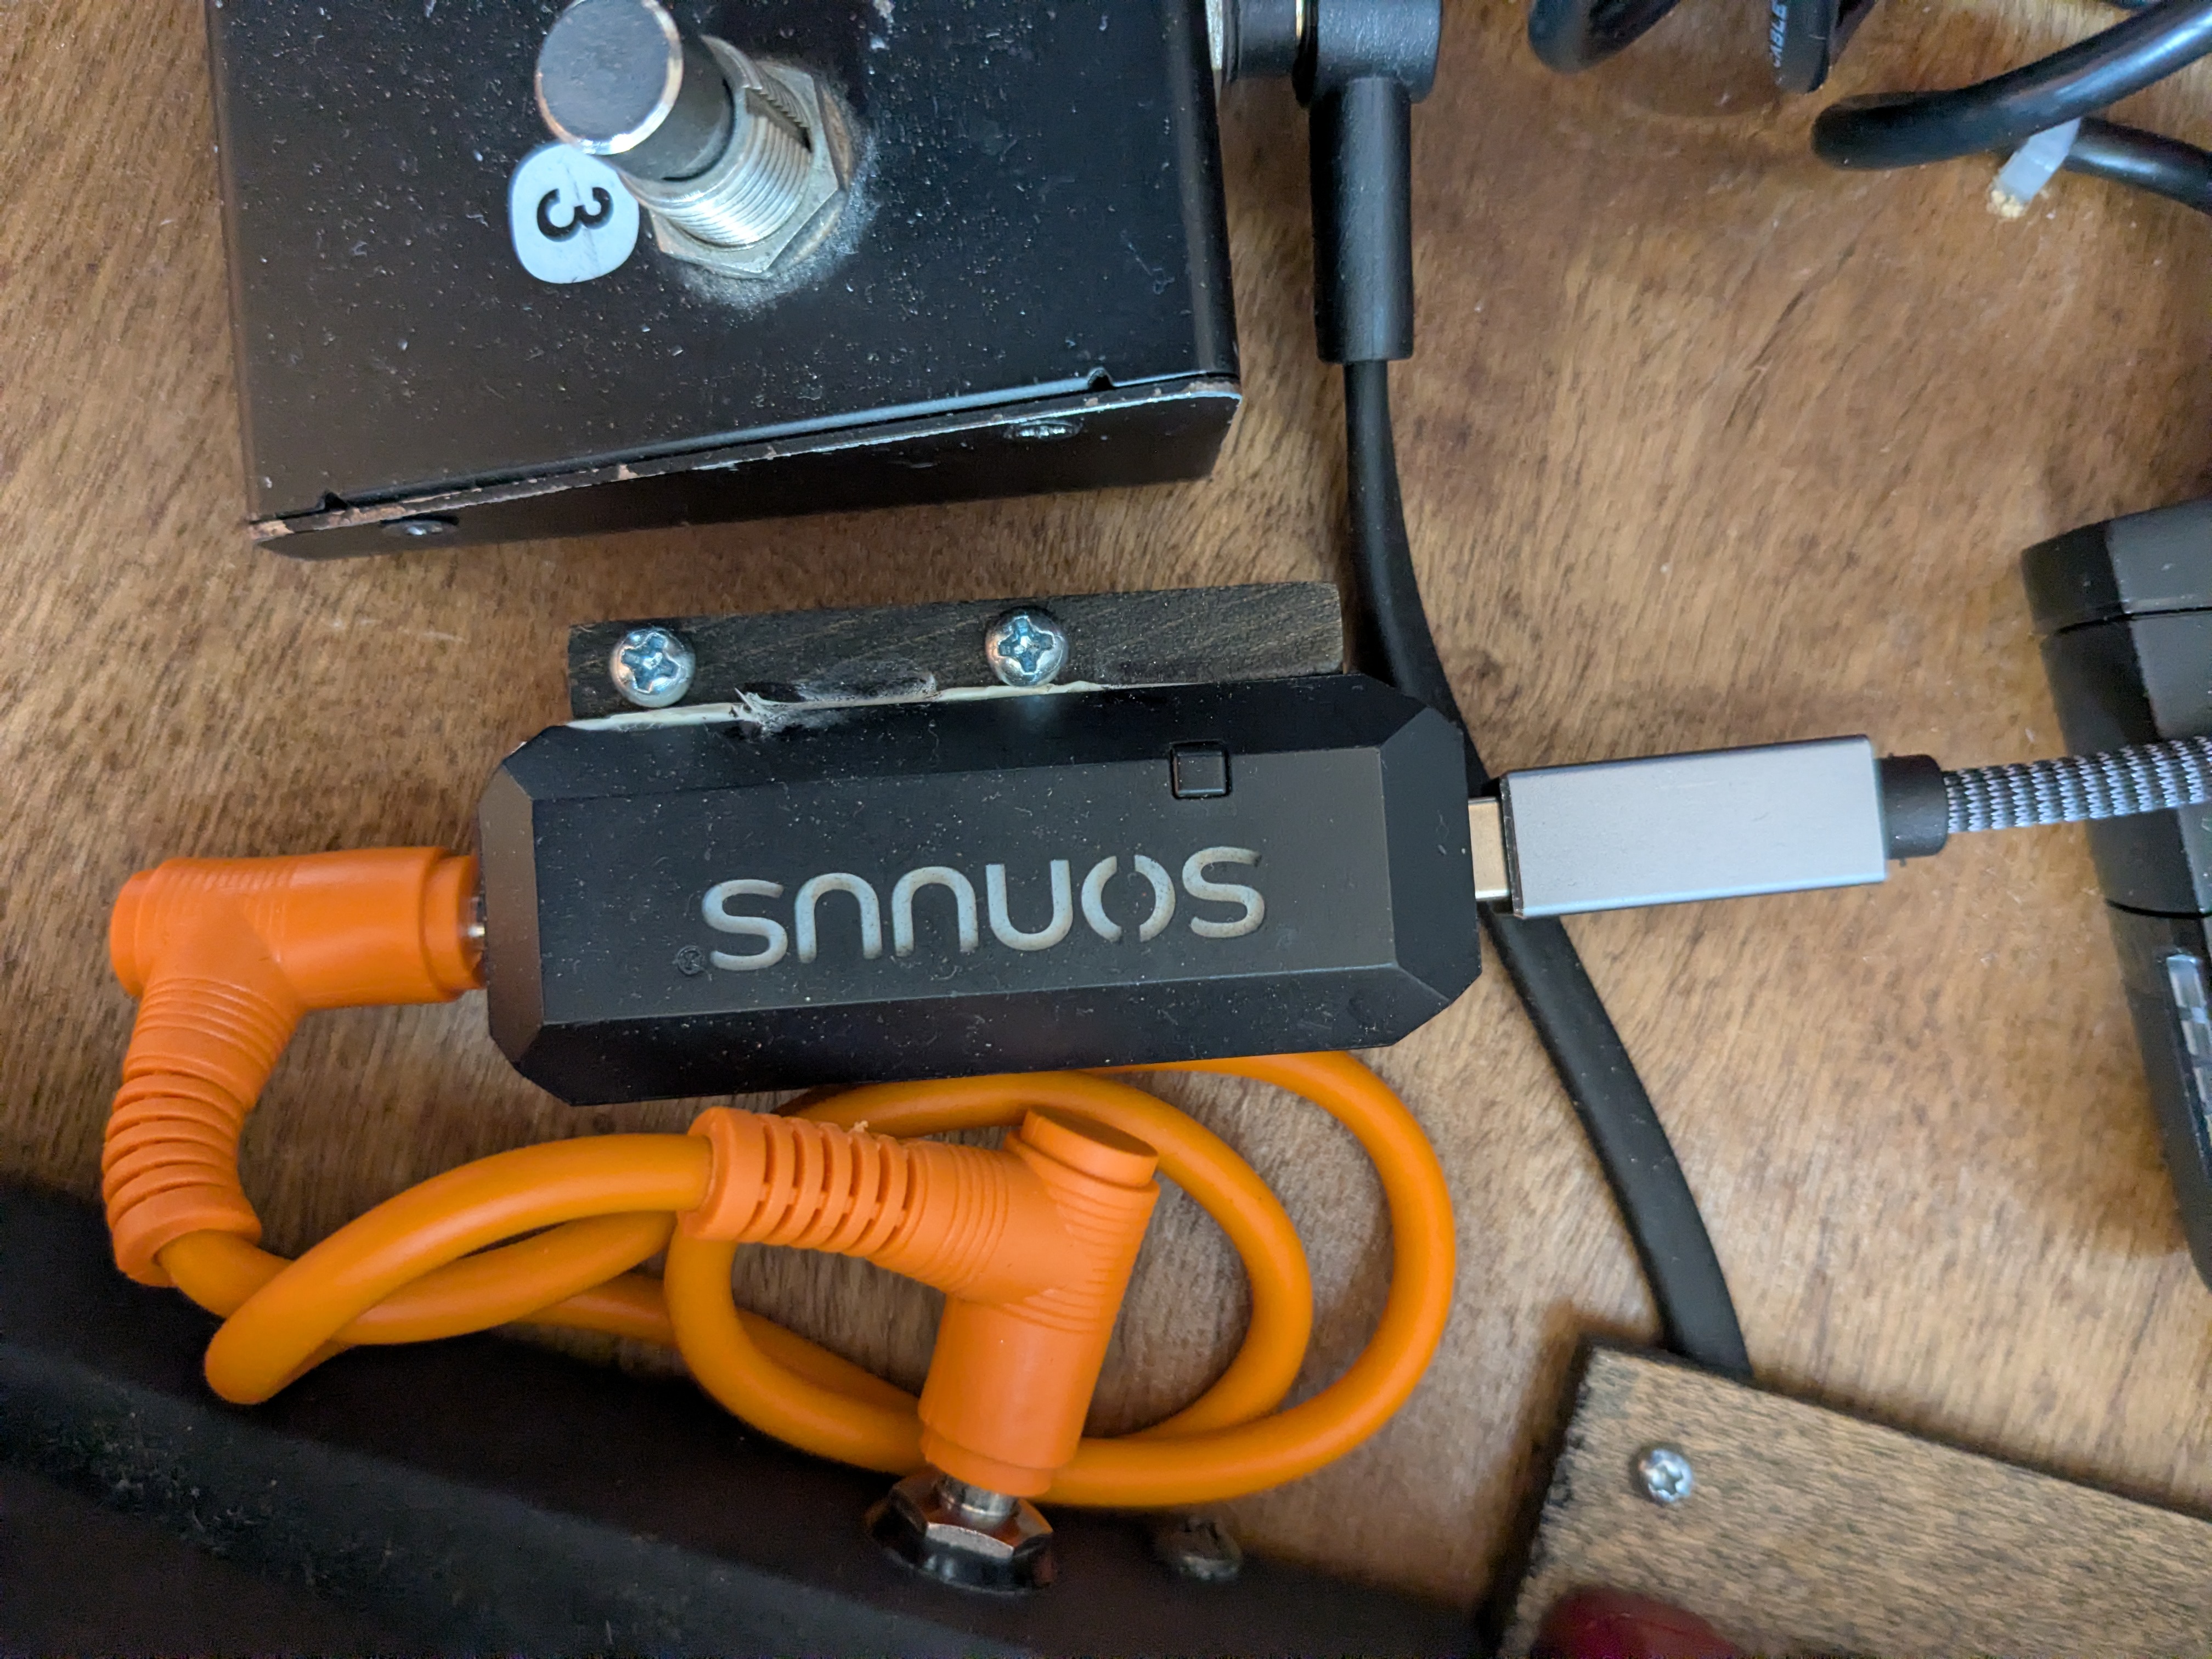
The Sonuus i2M is is lightweight enough by itself to easily attach with just velcro, but the inbound and outbound connections need to be stable. I occasionally need to unplug the USB side to reboot, so stabilizing via the inbound and outbound cables was not going to be adequate. The solution was to find a side of the device that can be obscured, then attach a small wooden mounting plate using silicone adhesive. The wooden mounting plate is then screwed down onto the pedalboard for a stable device mount.
In this case the mounting plate screws go through the long way, and the plate forms an 'L' with the pedalboard. It's quite stable with just the two screws visible.
Mounting strategy #5: Velcro and zipties
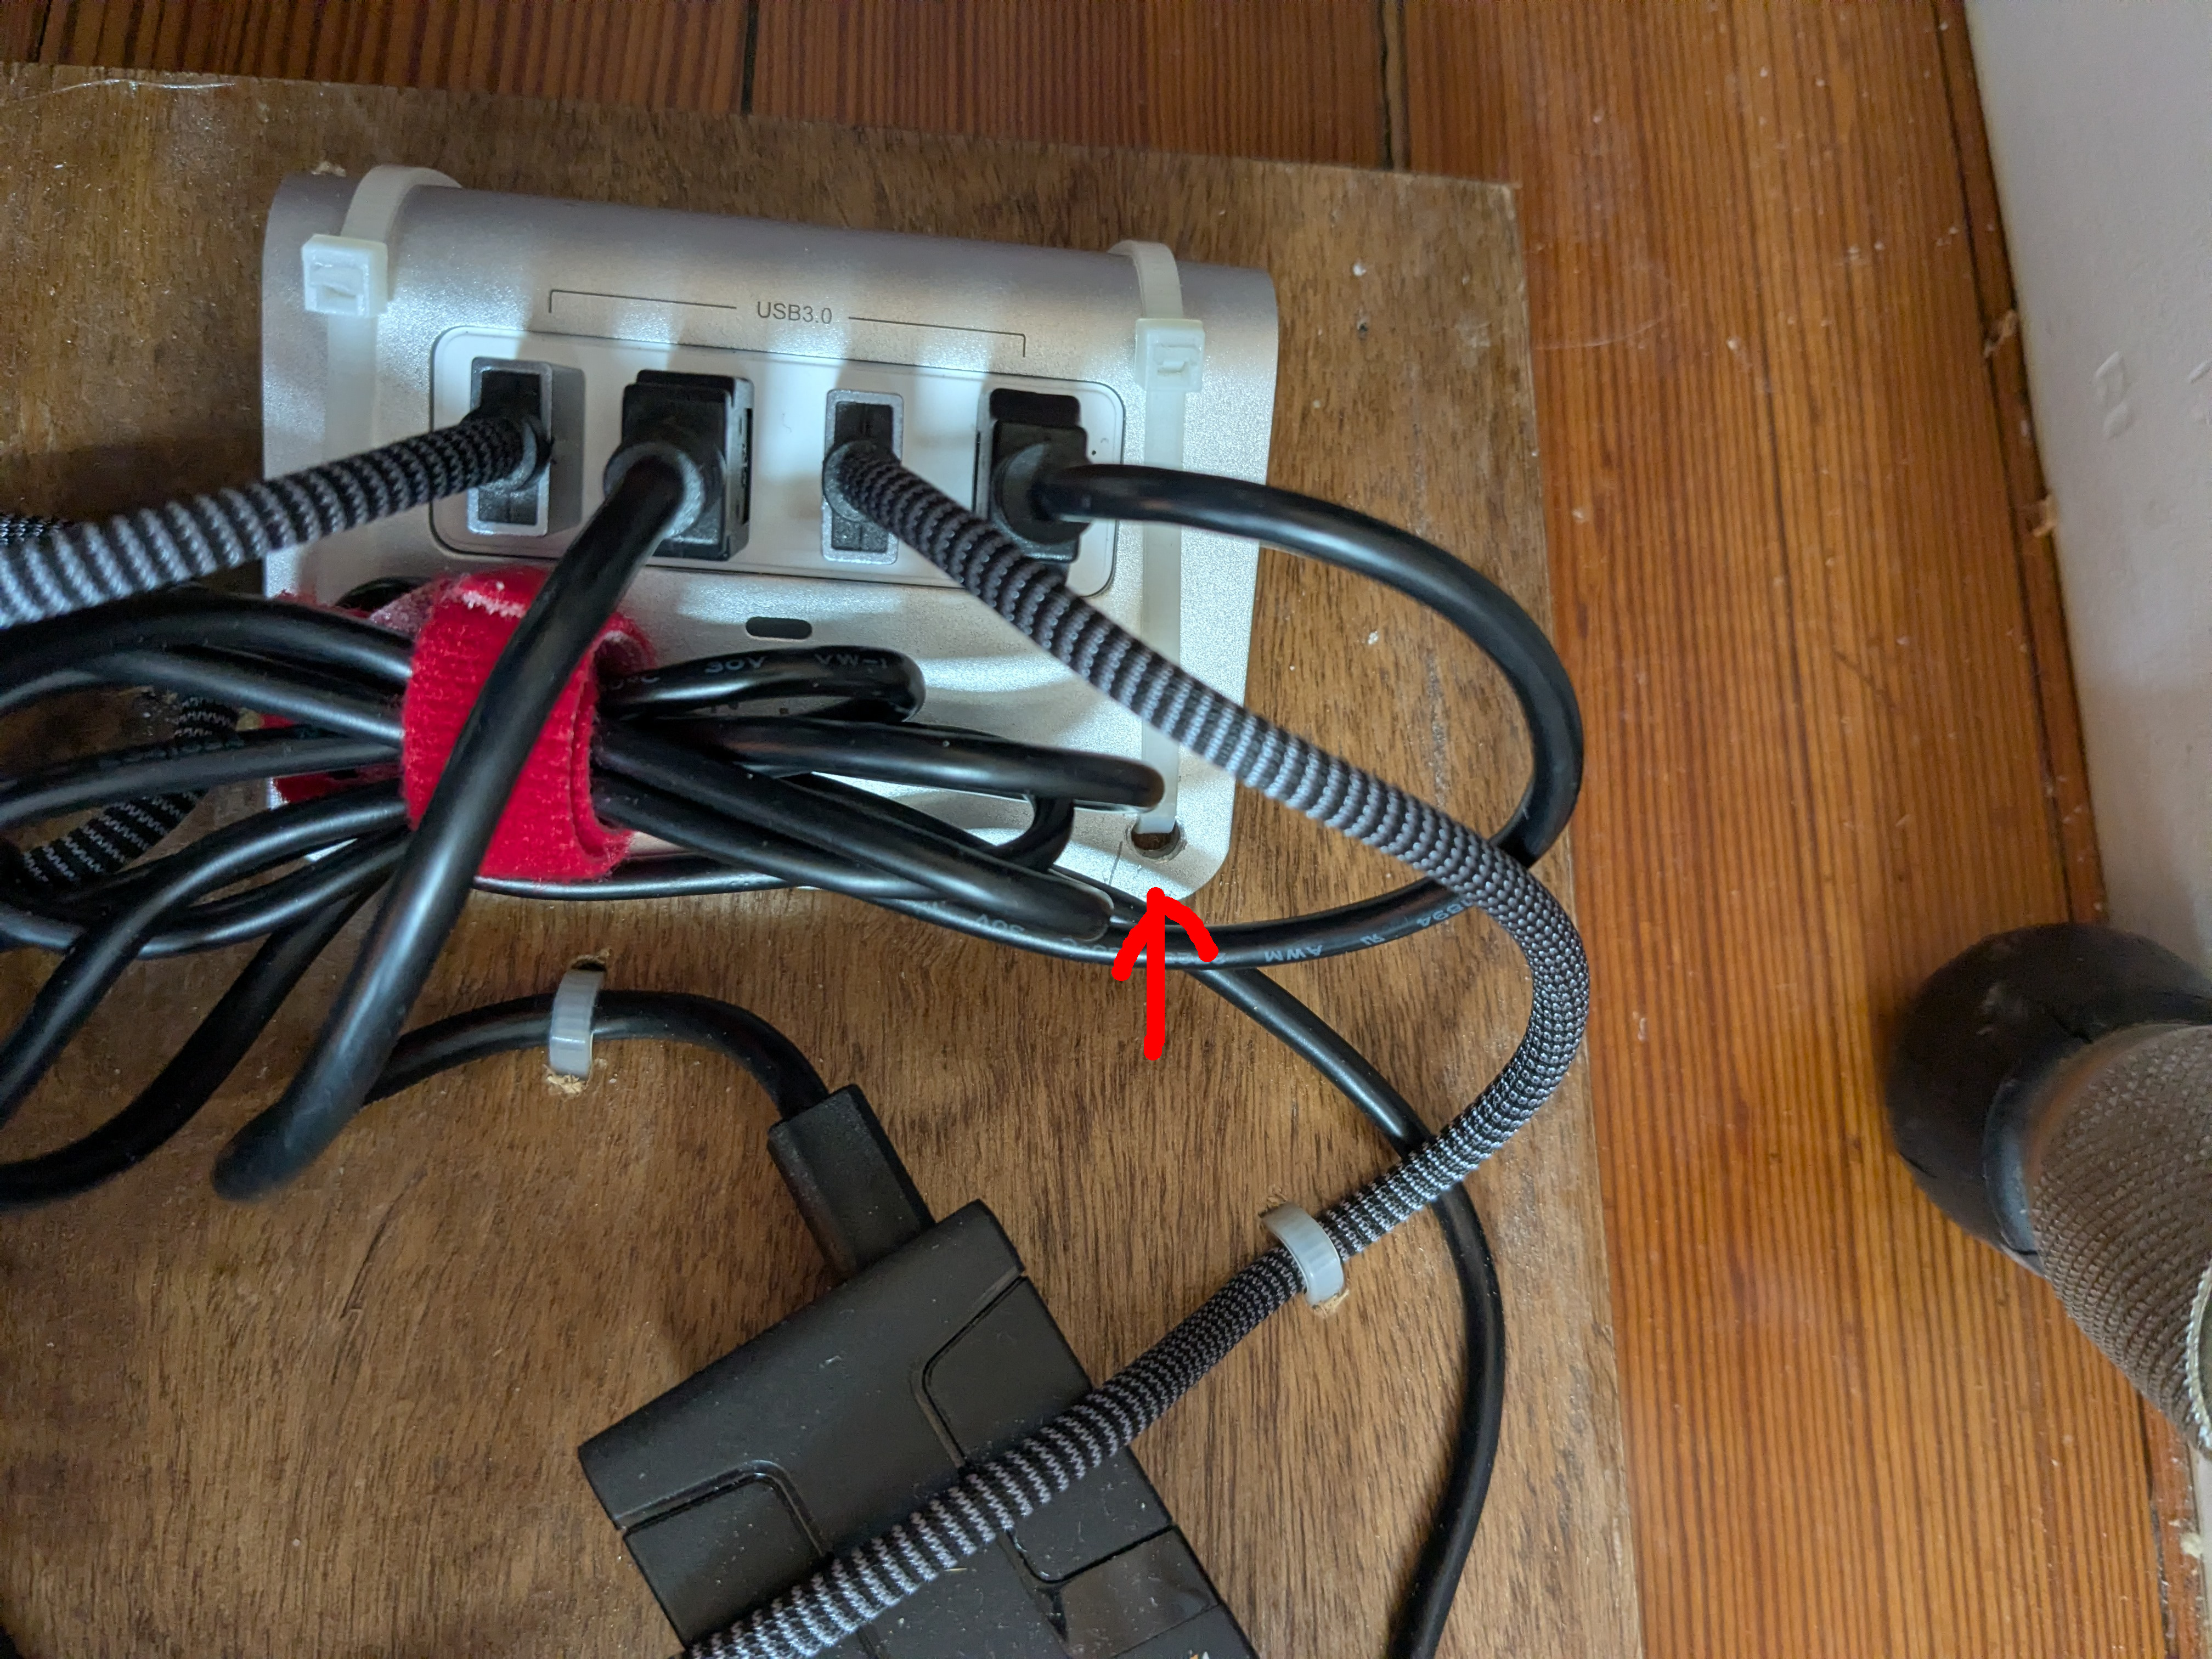
The USB hub is metal and has some pressure from numerous cables heading into it. It's attached to the pedalboard using velcro, but held in position using ziptie loops that hold it down to the pedalboard. Since the USB hub is snap together construction that doesn't want to be opened, it was fortunate there was some metal overhang on the top that left room enough to drill a couple of holes for the zipties to pass through. That keeps the ties from falling off sideways when the board is being jostled in transit.
The arrow shows one of the two holes with the ziptie passing through it before passing underneath the pedalboard and back up behind the hub to form a loop.
For cables that don't move, similar ziptie loops help keep things in place and avoid stress on devices when the pedalboard is traveling. Take care not to tighten any cable guide loops to the point where they stress the cable.
Mounting strategy #6: Plain hook and loop
Smaller lightweight devices that don't have much cable pressure can just be attached with velcro, which essentially functions as very strong double stick tape, adding the feature that you can pull the device off the board if you need to. Like tape, this is where a good polyurethane coating on the pedalboard is essential for bonding strength.
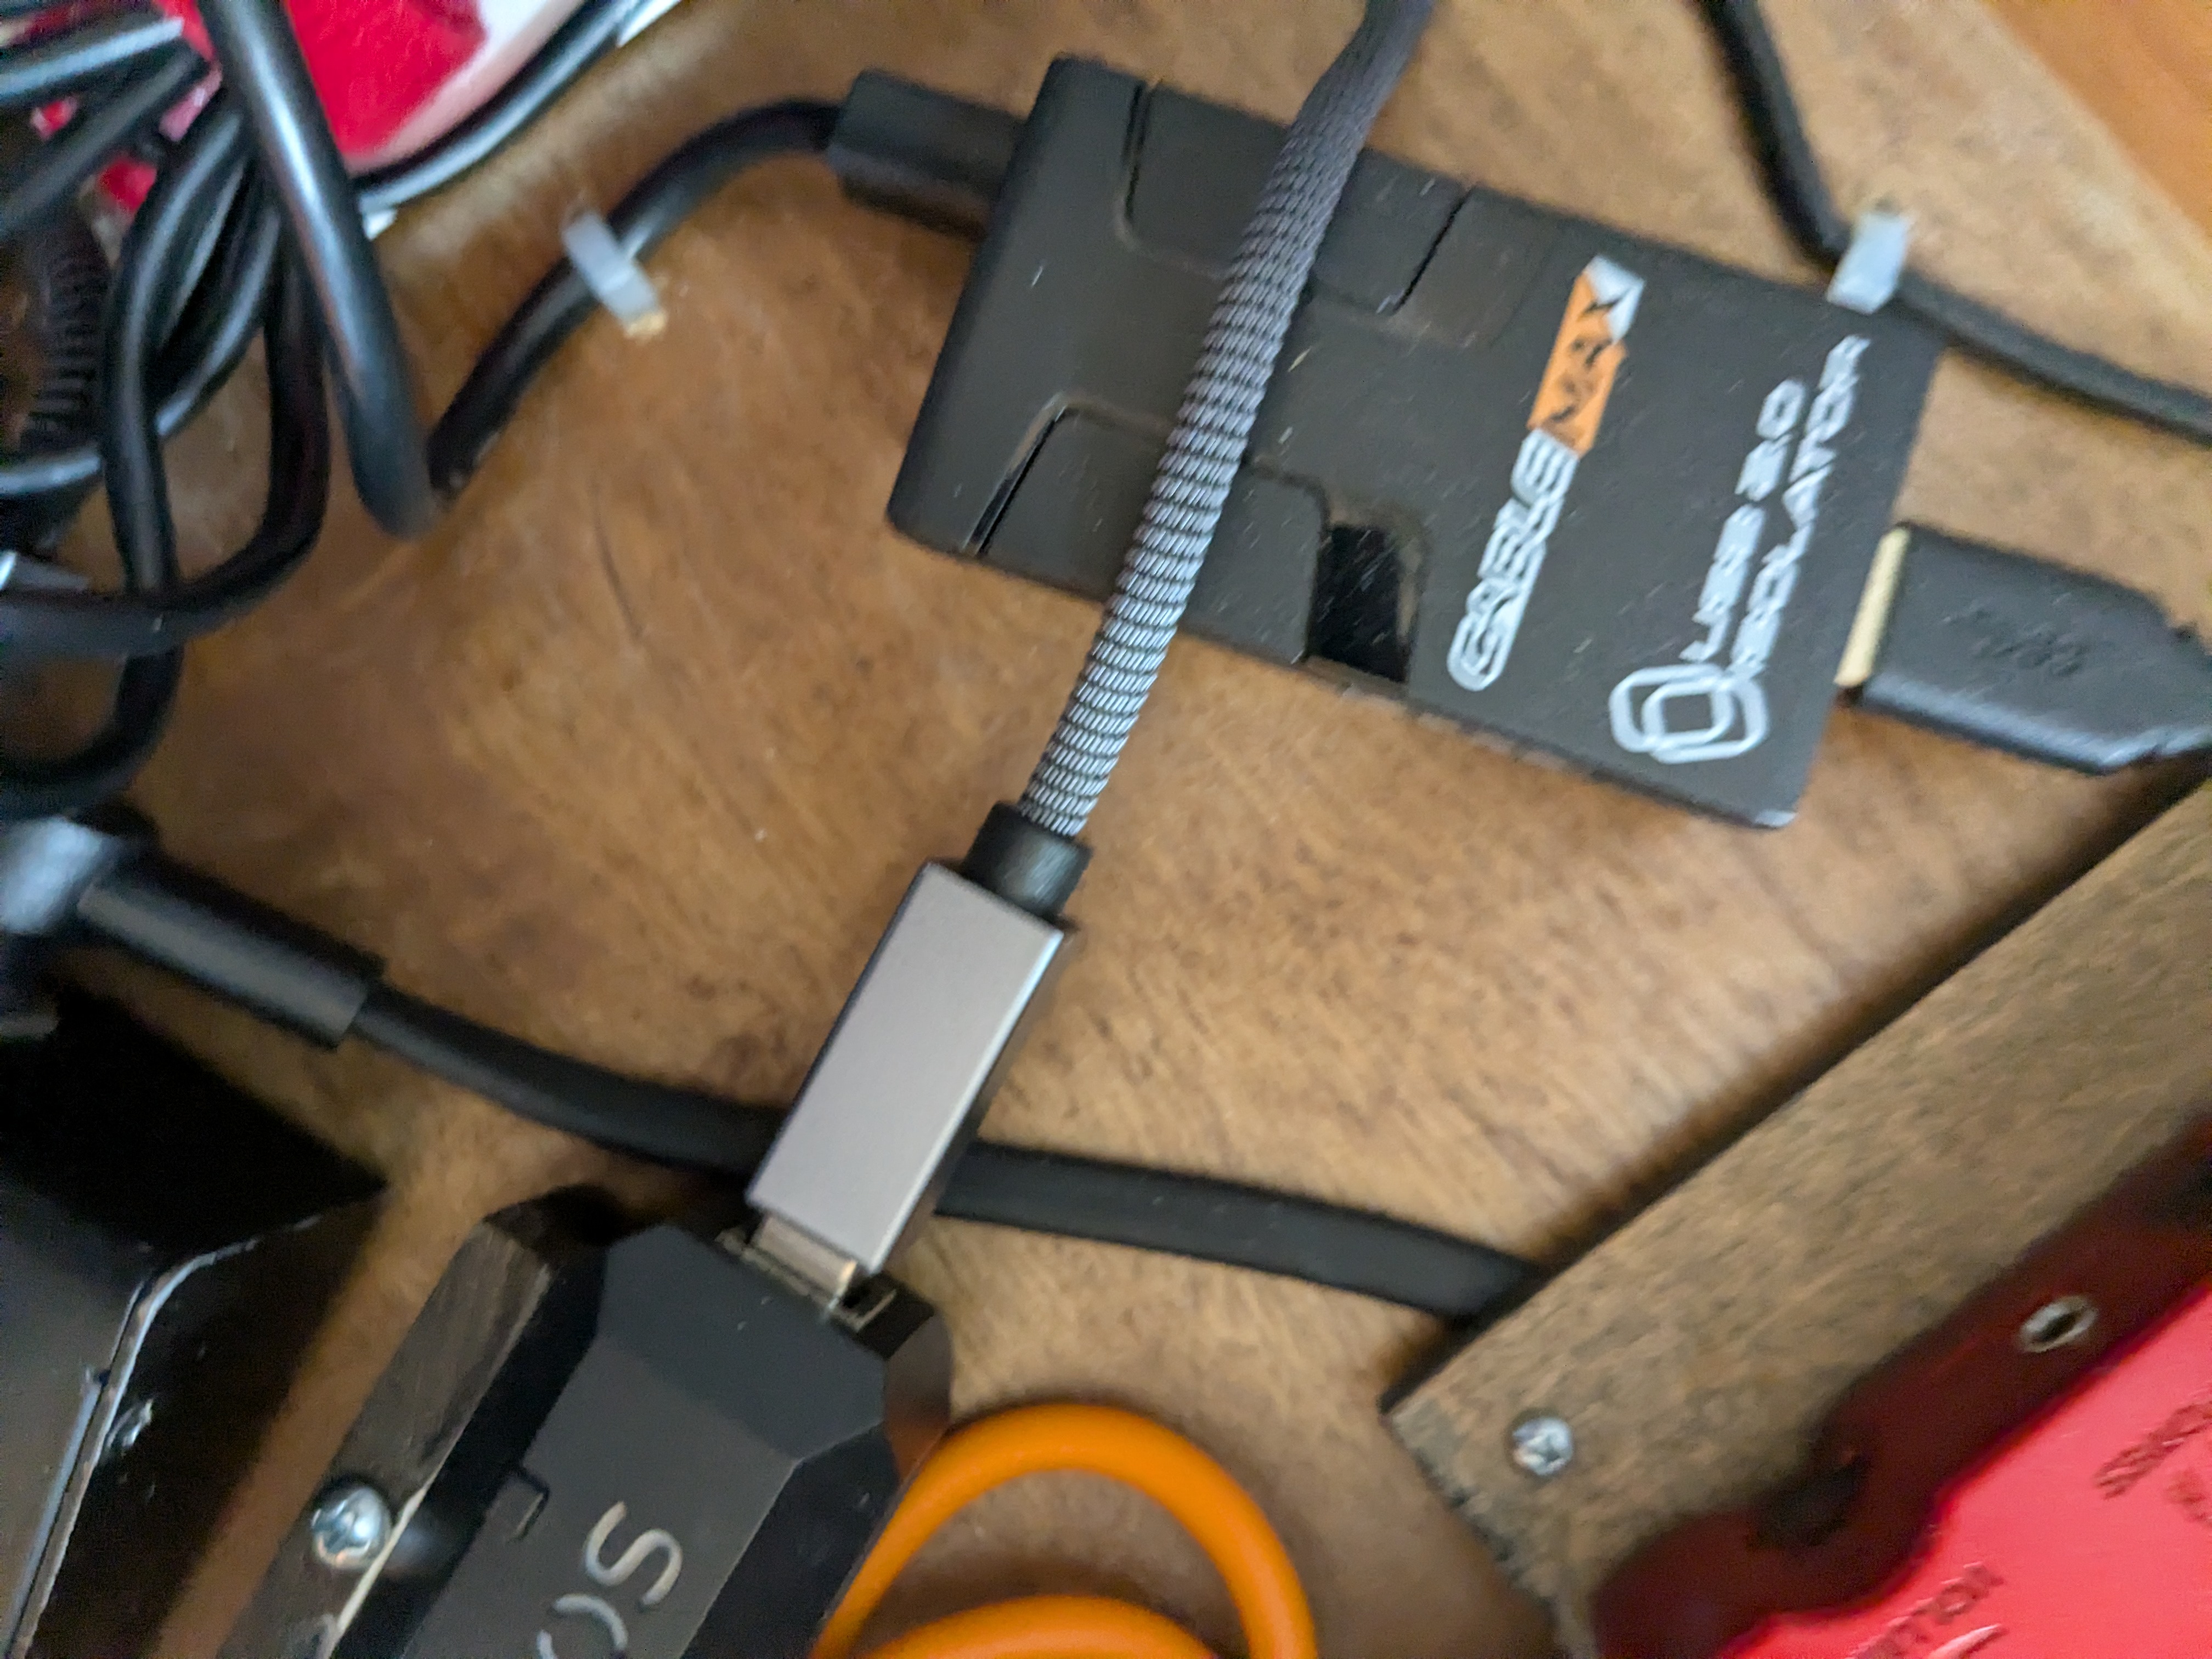
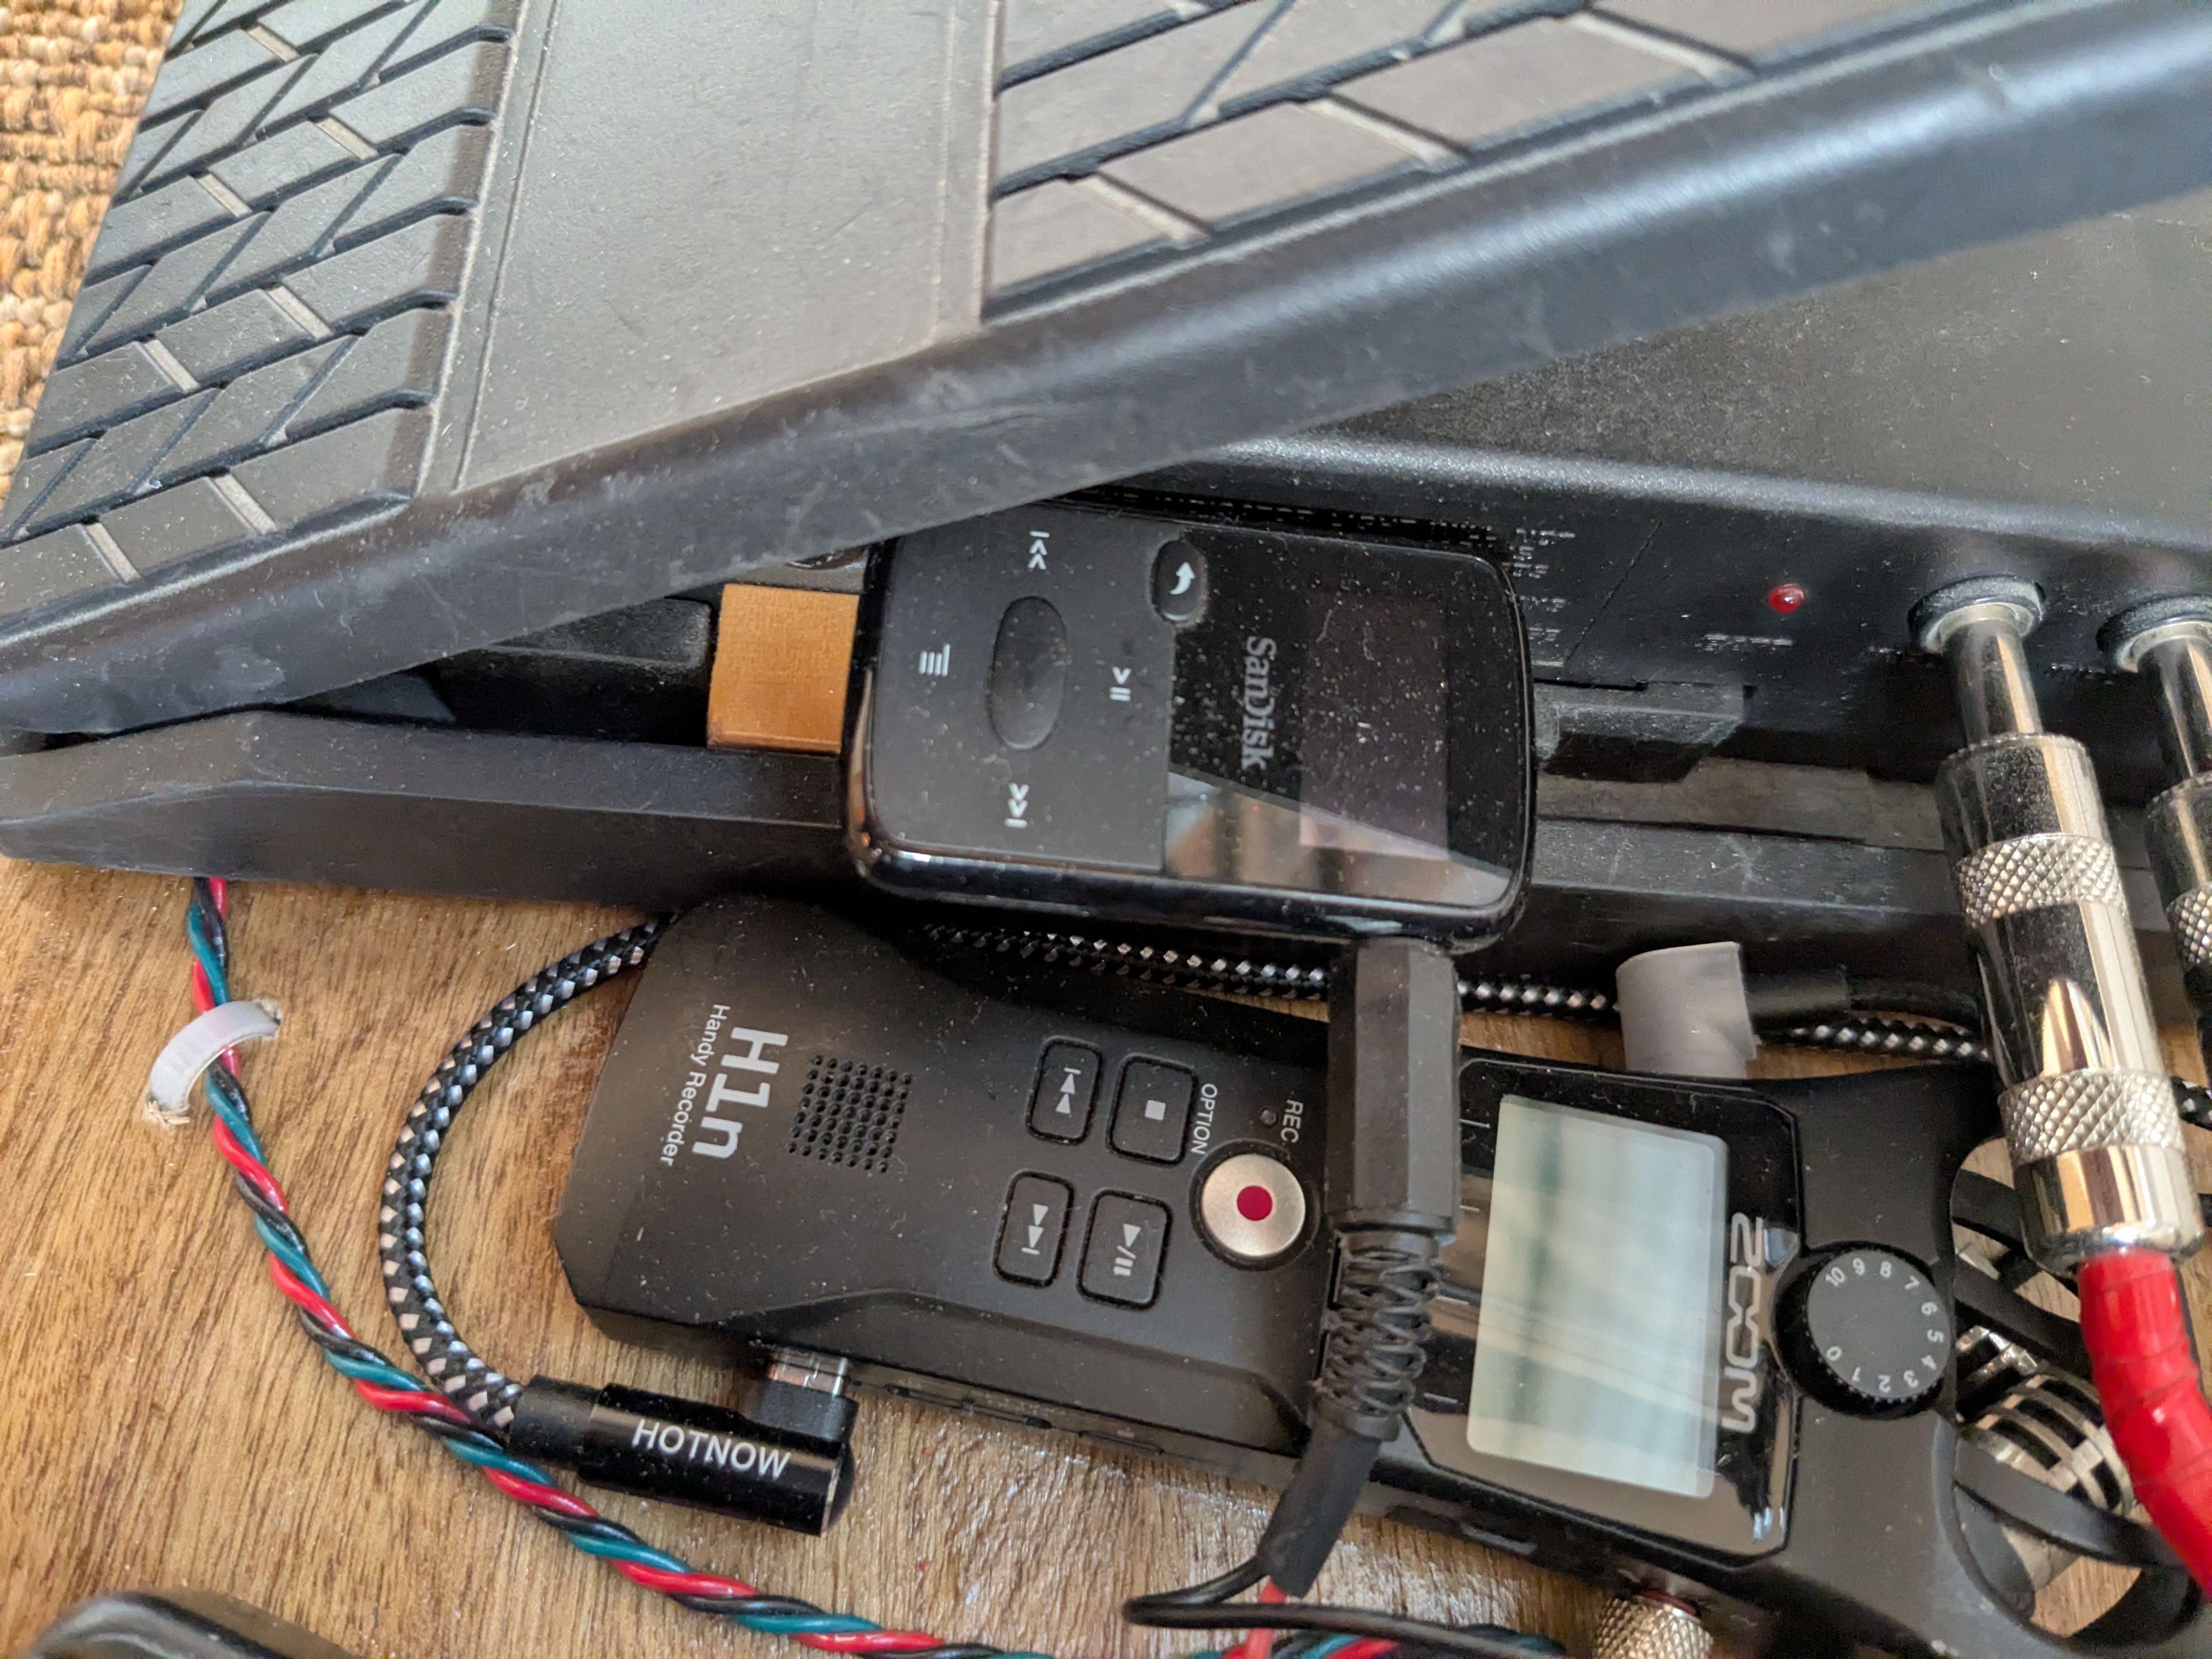
For the USB power isolation connector (needed to avoid a ground loop from the Zoom H1n recorder hanging off the mixer monitor out), thin and soft old school hook and loop is clean and adequate.
For the SanDisk mp3 player (used for sounds beween songs), I mounted a piece of finished wood in the flange part of the stereo volume pedal, then used hard click hook and loop to attach the SanDisk to that wood. I can pull it off to charge it and/or change the content, then know it's on solid when I click it back down.
House and studio
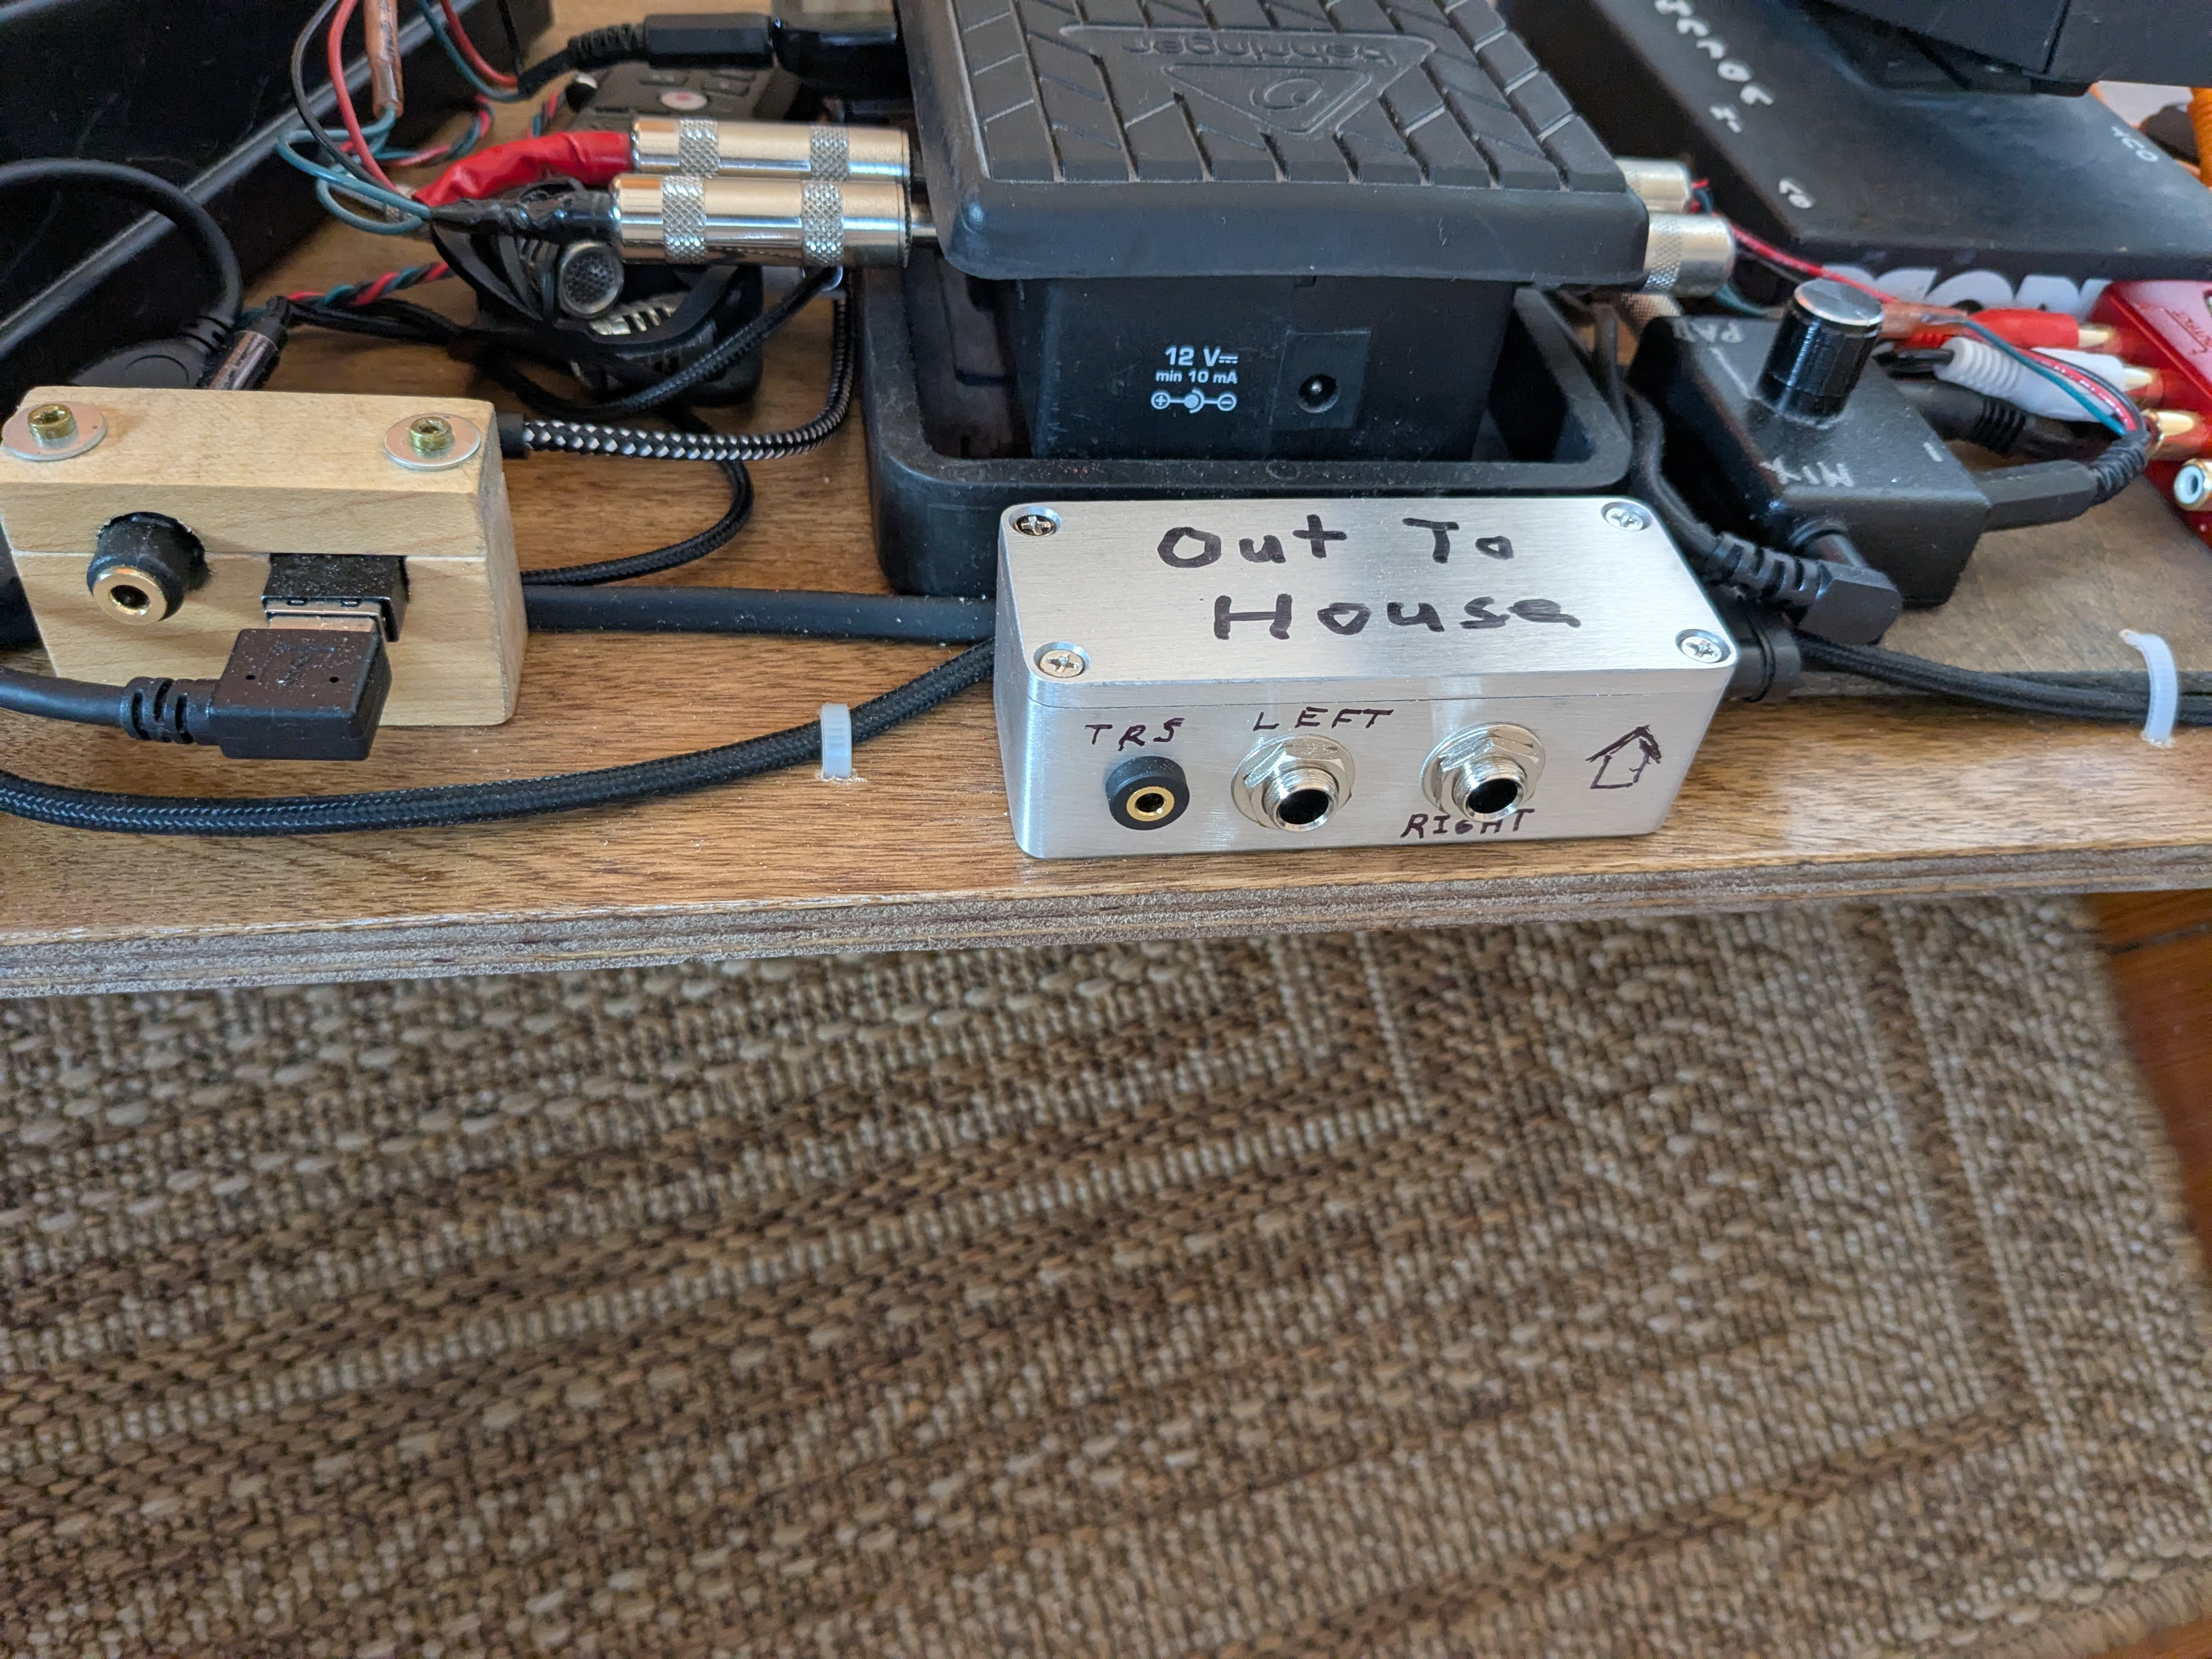
At some point a soundperson will approach your pedalboard with a DI box. They need to know how to connect, and have confidence they are getting decent sound with no bad surprises. That means you have to know, with the confidence that comes from having tested earlier, everything is going to go smoothly without drama. The common denominator for outbound PA connections is unbalanced nominal line level 1/4" standard musical instrument patch cords. The soundperson will deal with the stereo signal however they feel is best for the house. I built a simple junction box built to have cables roughly inserted and unceremoniously yanked out repeatedly. I also provided a 3.5mm stereo jack just in case that happens to be useful. If the junction box gets abused, the rest of my board is no worse for wear.
The little wood sandwich next to the house out junction box is a headphone out (used for actual headphones or for a monitoring amp) and a USB for pulling recordings off the Zoom.
As with all computer music, the cleanest possible output is digital. The optical out from the UCA222 is an option when it is not a live performance and mix-in transitionary sounds are not needed.
Cover and done
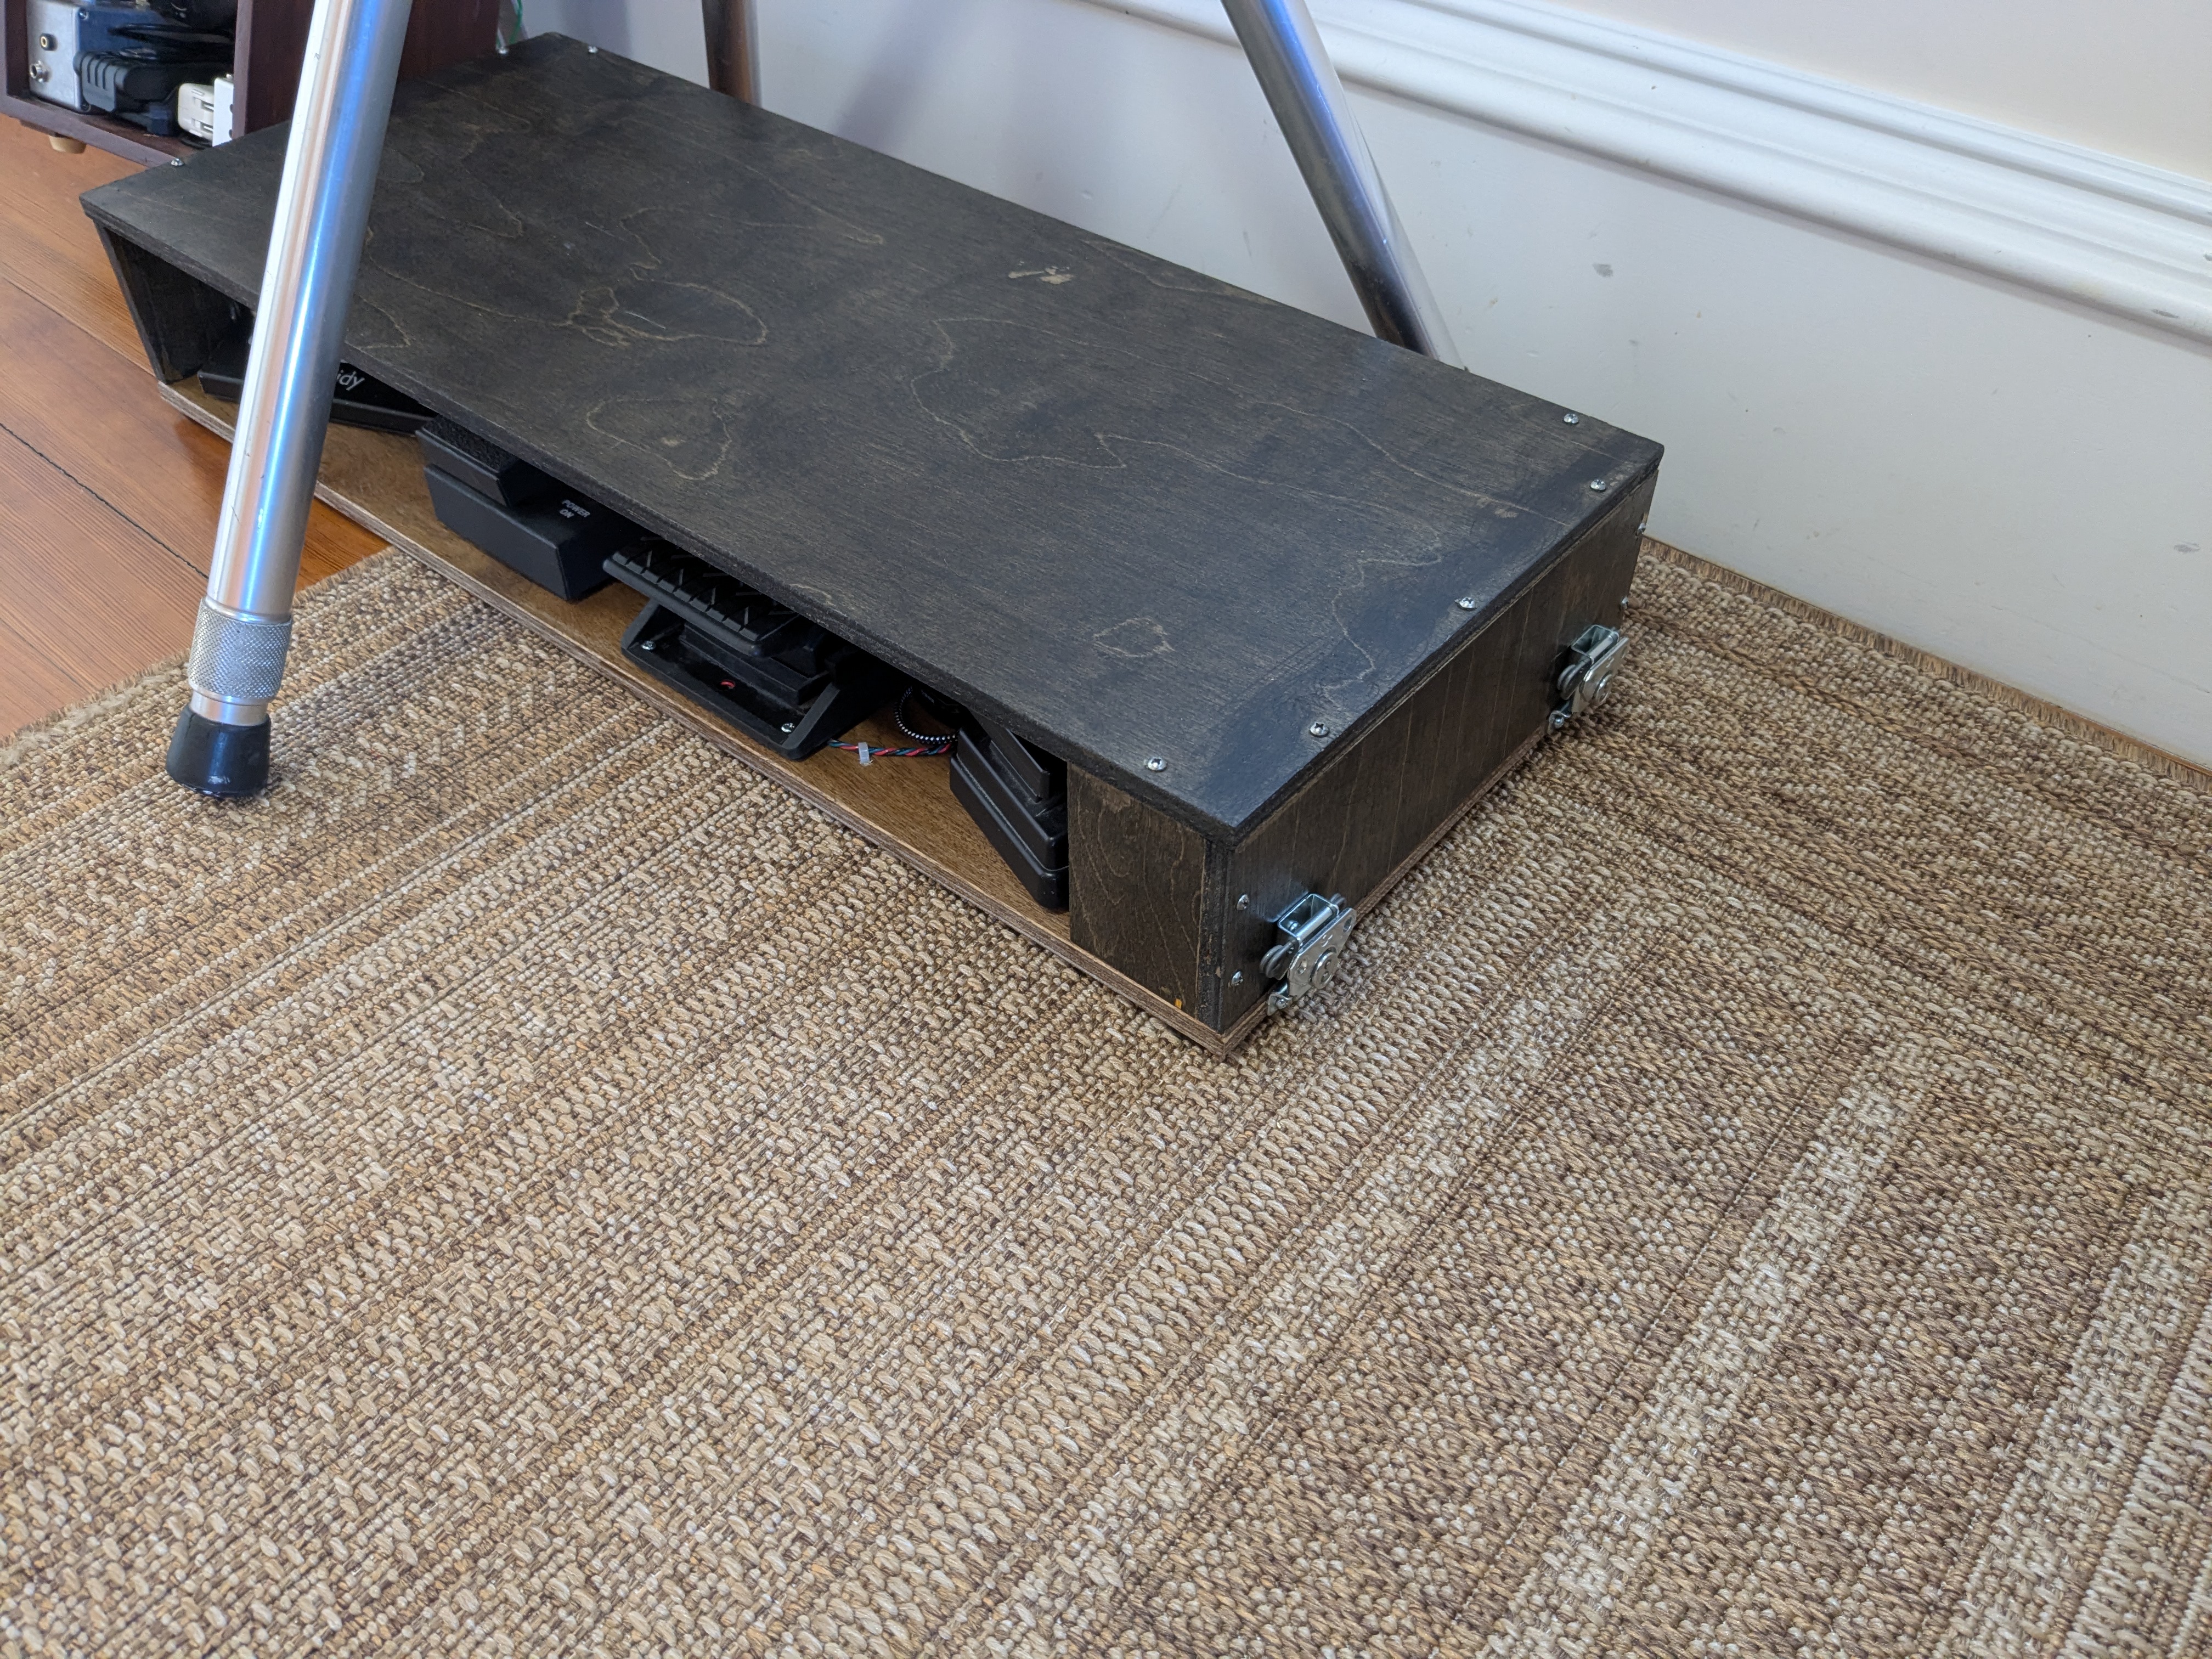
Here's the covered pedalboard with the cover made from the other 12x29" piece of plywood and sides made from the off cuts screwed and glued. Small butterfly latches hold the lid to the board. The surface mount latches and lid make the luggage fit tight, but it works.
This is NOT a roadcase, and if you stand on the top you will break it. The cover is enough for basic protection of the board if I put the board in a rolling duffel with something else that's not too heavy (like my battery powered amp). Dragging a duffel around myself is fine, but I would never trust it to an airline. For that I would put the pedalboard in a proper roadcase and leave this cover at home.
Your pedalboard needs are probably very different from mine, but hopefully some of what I did might help you build what you need.